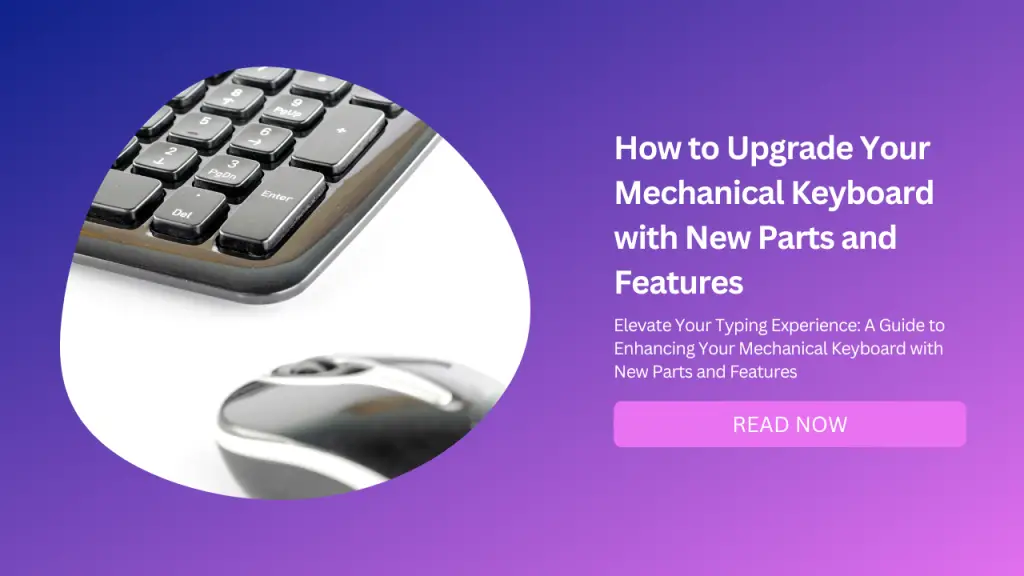
Mechanical keyboards are popular among computer users who value the satisfying feel and sound of the switches, the durability and customization of the keycaps, and the overall performance and aesthetics of their keyboards.
However, not all mechanical keyboards are created equal, and some may require some upgrades to enhance their typing experience.
In this blog post, we will show you how to upgrade your mechanical keyboard with new parts and features that will make it more comfortable, quieter, and personalized.
We will also include some keywords and their relevant and semantically related keywords that you can use to optimize your blog for search engines.
Upgrade Your Keycaps
One of the easiest and most noticeable ways to upgrade your mechanical keyboard is to replace your keycaps with a new set. Keycaps are plastic covers that fit over the switches and have the letters and symbols printed on them.
They come in different materials, colors, shapes, and sizes, and can affect the feel, sound, and look of your keyboard.
Materials of Keycaps
The most common materials for keycaps are ABS (acrylonitrile butadiene styrene) and PBT (polybutylene terephthalate).
ABS Keycaps are cheaper and more widely available, but they tend to wear down faster and develop a shiny or greasy appearance over time.
PBT Keycaps are more durable and resistant to shine, but they are more expensive and harder to find. You can read more about the differences between ABS and PBT keycaps here.
Shape and Size of Keycaps
The shape and size of keycaps are determined by their profile, which refers to how high they are and how they curve. There are many different profiles for keycaps, such as Cherry, OEM, SA, DSA, XDA, etc.
Each profile has its own advantages and disadvantages in terms of comfort, ergonomics, aesthetics, and compatibility. You can read more about the different keycap profiles here.
Color and Design of Keycaps
The color and design of keycaps are a matter of personal preference, but they can also affect the readability and visibility of your keyboard. Some keycaps have legends (the letters and symbols) that are printed on them with ink or laser etching.
These legends can fade or rub off over time, especially on ABS keycaps. Other keycaps have legends that are molded into them with double-shot or dye-sublimation techniques.
These legends are more durable and resistant to fading, but they are also more expensive and harder to produce. You can read more about the different keycap printing methods here.
To upgrade your keycaps, you will need a new set of keycaps that match your keyboard layout and switch type (Cherry MX-style switches are the most common), and a keycap puller tool that can help you remove your old keycaps without damaging them or the switches.
You can find many online stores that sell keycaps in various styles and prices, such as Amazon, KBDFans, Drop, etc.
Keywords: keycaps, ABS, PBT, profile, legend Relevant keywords: switches, layout, material Semantically related keywords:
Upgrade Your Switches
Another way to upgrade your mechanical keyboard is to replace your switches with a new set. Switches are the mechanical components that register each keystroke when you press a keycap. They come in different types, such as clicky, linear or tactile, depending on how they feel and sound when you press them.
Clicky Switches
Clicky switches have a distinct click sound and a tactile bump when you press them. They provide audible and tactile feedback for each keystroke, but they can also be loud and annoying for some people or environments.
Examples of clicky switches are Cherry MX Blue, Kailh Box White, etc.
Linear Switches
Linear switches have a smooth and consistent feel when you press them. They do not have any clicking sound or tactile bump, which makes them quieter and faster for some users or applications. Examples of linear switches are Cherry MX Red, Gateron Black, etc.
Tactile Switches
Tactile switches have a tactile bump but no click sound when you press them. They provide tactile feedback for each keystroke without being too loud or distracting. Examples of tactile switches are Cherry MX Brown, Zealios V2, etc.
To upgrade your switches, you will need
A new set of switches that match your preference and keyboard type:
A soldering iron or a switch puller tool depending on your keyboard type (soldered keyboards require desoldering the old switches before soldering the new ones; hot-swappable keyboards allow you to remove and insert switches without soldering),
A switch opener tool if you want to modify or lubricate your switches (some switches come pre-lubed or pre-modded), and some lubricant if you want to make your switches smoother or quieter (you can use various types of oils or greases for this purpose).
You can find many online stores that sell switches in various types and prices, such as NovelKeys, KBDfans, Drop, etc.
Keywords: switches, clicky, linear, tactile Relevant keywords: soldering, hot-swappable Semantically related keywords: mechanical keyboard
Stabilizer Modification
A third way to upgrade your mechanical keyboard is to modify your stabilizers. Stabilizers are the metal bars that connect some of the larger keys (such as the spacebar, enter, shift, etc.) to multiple switches underneath them. They help keep these keys stable and balanced when you press them.
Cause
However, some stabilizers can also cause problems such as rattling, wobbling, or sticking, which can affect the sound and feel of your keyboard. To fix these issues, you can modify your stabilizers by clipping, lubing, or band-aid modding them.
Clipping Stabilizers
Clipping stabilizers involves cutting off the extra plastic legs on the bottom of the stabilizer stems. These legs can cause unwanted noise and friction when they hit the PCB (printed circuit board) of your keyboard. By clipping them off, you can reduce the rattle and improve the smoothness of your stabilizers.
Lubing Stabilizers
Lubing stabilizers involves applying lubricant to the metal bars and plastic parts of the stabilizers. This can help reduce friction, noise, and stickiness, and make your stabilizers smoother and quieter. You can use different types of lubricants for this purpose, such as dielectric grease, Krytox 205g0, etc.
Band-Aid Modding Stabilizers
Band-aid modding stabilizers involve applying small pieces of a band-aid or fabric tape to the PCB where the stabilizer legs hit.
This can help dampen the sound and cushion the impact of the stabilizer legs on the PCB. You can also apply some lubricant on top of the band-aid or tape for extra smoothness.
To modify your stabilizers, you will need:
A set of stabilizers that match your keyboard layout and size (plate-mounted or PCB-mounted)
A pair of scissors or wire cutters for clipping
A small brush or applicator for lubing
Some band-aids or fabric tape for band-aid modding
Some lubricant of your choice
You can find many online guides and videos that show you how to modify your stabilizers step by step, such as this one.
Keywords: stabilizers, clipping, lubing, band-aid modding Relevant keywords: rattle, wobble, stickiness Semantically related keywords: mechanical keyboard
Sound-Proof Your Mechanical Keyboard
A fourth way to upgrade your mechanical keyboard is to soundproof it with foam or dampening pads. This can help reduce the vibrations and echoes that are created when you type on your keyboard, and make it quieter and more pleasant to use.
Foam
Foam is a soft material that can absorb sound waves and fill up empty spaces inside your keyboard case.
Types of Foam
You can use different types of foam for this purpose, such as:
Neoprene Foam,
Sorbothane Foam,
EVA foam
You will need to cut out pieces of foam that fit inside your keyboard case and place them between the PCB and the bottom case.
Dampening Pads
Dampening pads are thin sheets of rubber-like material that can dampen sound waves and stick to surfaces inside your keyboard case.
Types of Dampening Pads
You can use different types of dampening pads for this purpose, such as:
Dynamat Xtreme
Silent Coat
Noico Solutions
You will need to cut out pieces of dampening pads that fit inside your keyboard case and stick them to the top case, the bottom case, or both.
To sound-proof your mechanical keyboard, you will need:
Some foam or dampening pads of your choice
A pair of scissors or a knife for cutting
A ruler or a tape measure for measuring
A pencil or a marker for marking
Some tools for opening your keyboard case (such as a screwdriver).
You can find many online guides and videos that show you how to soundproof your mechanical keyboard step by step, such as this one.
Keywords: foam, dampening pads, sound-proofing Relevant keywords: vibrations, echoes, noise reduction Semantically related keywords: mechanical keyboard
Get a Custom USB Cable
A fifth way to upgrade your mechanical keyboard is to get a custom USB cable for your mechanical keyboard. A custom USB cable is a cable that is made to your specifications, such as length, color, connector type, and coil style.
A custom USB cable can add some flair and personality to your keyboard setup, as well as improve cable management and durability of your cable.
There are many online stores that offer custom USB cable services, such as Mechcables, Clark Kable, etc. You can choose from various options for your cable, such as:
Cable Sleeve
This is the outer layer of the cable that covers the wires and protects them from damage. You can choose from different materials, such as Paracord, techflex, etc., and different colors and patterns to match your keyboard theme.
Connectors
These are the metal parts that plug into your keyboard and your computer. You can choose from different types, such as USB-A, USB-C, micro-USB, mini-USB, etc., and different colors and finishes, such as silver, gold, black, etc.
You can also choose to have a detachable connector, such as an aviator or a push-pull connector, that allows you to swap cables easily or use different devices with the same cable.
Heatshrink
This is the plastic tubing that covers the ends of the cable sleeve and the connectors. It helps secure the cable and prevent it from fraying or coming loose. You can choose from different colors and sizes to match your cable sleeve and connectors.
Coil
This is an optional feature that adds a spiral shape to your cable. It gives your cable a retro and elegant look, as well as some flexibility and springiness. You can choose the length and diameter of your coil, as well as the position of it on your cable.
To get a custom USB cable for your mechanical keyboard, you will need to order one from an online store that offers this service. You will need to specify your preferences for each option mentioned above, as well as the total length of your cable.
The price and production time of your cable will depend on the options you choose and the availability of the materials.
Keywords: custom USB cable, mechanical keyboard Relevant keywords: cable sleeve, connectors, heat shrink, coil Semantically related keywords: keyboard setup
Add LED Backlighting
If your mechanical keyboard does not have LED backlighting, or if you want to change the color or brightness of your existing backlighting, you can add or replace the LEDs on your keyboard.
LED backlighting can make your keyboard more visible in low-light conditions, as well as add some flair and mood to your keyboard setup.
To add or replace LED backlighting, you will need:
A new set of LEDs that match your keyboard layout
Switch type (some switches have different LED positions or sizes)
A soldering iron and solder wire
A desoldering pump or wick
A pair of tweezers or pliers
Some tools for opening your keyboard case (such as a screwdriver).
You will need to open your keyboard case and desolder the old LEDs (if any) from the PCB. Then, you will need to solder the new LEDs to the PCB, making sure to align the polarity correctly (the longer leg of the LED is positive and the shorter leg is negative).
You can also use some electrical tape or heat shrink to insulate the LED legs and prevent them from shorting. Finally, you will need to close your keyboard case and test your new backlighting.
You can find many online guides and videos that show you how to add or replace LED backlighting on your mechanical keyboard step by step, such as this one.
Keywords: LED backlighting, mechanical keyboard Relevant keywords: soldering, desoldering Semantically related keywords: keyboard lighting
Add a Wrist Rest
A wrist rest is a cushioned pad that supports your wrists and palms when you type on your keyboard. A wrist rest can help reduce fatigue, strain, and discomfort on your wrists and hands, as well as improve your posture and ergonomics.
A wrist rest can also enhance the look and feel of your keyboard setup.
To add a wrist rest to your mechanical keyboard:
You will need to buy or make a wrist rest that matches your keyboard size and style.
You can choose from different materials, such as wood, leather, foam, gel, etc., and different colors and designs to suit your preferences.
You can also choose between a fixed or adjustable wrist rest, depending on how much flexibility you want.
You can find many online stores that sell wrist rests in various sizes and styles, such as Glorious PC Gaming Race, Razer, etc.
Add a Custom Keycap Set
A custom keycap set is a set of keycaps that have a unique design, color, or theme that differs from the standard or stock keycaps.
A custom keycap set can make your mechanical keyboard more personalized and attractive, as well as improve the feel and sound of your keycaps.
To add a custom keycap set to your mechanical keyboard, you will need:
To buy or make a custom keycap set that matches your keyboard layout and switch type (Cherry MX-style switches are the most common)
A keycap puller tool that can help you remove your old keycaps without damaging them or the switches.
You can find many online stores that sell custom keycap sets in various styles and prices, such as Drop, KBDFans, Pimp My Keyboard, etc. You can also make your own custom keycap set using some DIY materials and tools, such as this guide.
To add a custom keycap set to your mechanical keyboard, you will need to remove your old keycaps with the keycap puller and replace them with the new custom keycaps. You can also mix and match different keycaps from different sets to create your own unique combination.
Keywords: custom keycap set, mechanical keyboard Relevant keywords: design, color, theme Semantically related keywords: keyboard customization
Add a Macro Pad
A macro pad is a small device that has a few extra keys that can be programmed to perform various functions, such as launching applications, executing commands, typing shortcuts, etc.
A macro pad can help you increase your productivity and efficiency by giving you quick access to your most frequently used tasks or actions.
To add a macro pad to your mechanical keyboard, you will need:
To buy or make a macro pad that suits your needs and preferences.
You can choose from different sizes, shapes, and layouts for your macro pad, as well as different switches and keycaps.
You can find many online stores that sell macro pads in various types and prices, such as Keebio, SpaceCat Design, etc. You can also make your own macro pad using some DIY materials and tools, such as this guide.
To add a macro pad to your mechanical keyboard, you will need to connect it to your computer via USB and program it using software such as QMK Firmware or VIA Configurator.
You can assign different functions or macros to each key on your macro pad according to your liking. You can also customize the lighting and appearance of your macro pad if it supports RGB LEDs or OLED screens.
Add a Custom Case
A custom case is a case that has a different shape, material, or color than the original or stock case of your mechanical keyboard. A custom case can make your mechanical keyboard more sturdy, ergonomic, or stylish, depending on your choice.
To add a custom case to your mechanical keyboard, you will need:
To buy or make a custom case that fits your keyboard size and layout.
You can choose from different materials, such as wood, metal, acrylic, etc., and different colors and finishes to match your preferences.
You can also choose between a high-profile or a low-profile case, depending on how many of the switches and keycaps you want to expose.
Source of Custom Cases
You can find many online stores that sell custom cases in various types and prices, such as KBDFans, Drop, etc. You can also make your own custom case using some DIY materials and tools, such as this guide.
Process
To add a custom case to your mechanical keyboard, you will need to open your original case and remove the PCB and plate from it. Then, you will need to install the PCB and plate into the new custom case and secure it with screws or standoffs.
Finally, you will need to close the new custom case and test your keyboard. Keywords: custom case, mechanical keyboard Relevant keywords: material, color, profile Semantically related keywords: keyboard modification
Add a Rotary Encoder
A rotary encoder is a knob that can be rotated to perform various functions, such as adjusting volume, brightness, scrolling, etc.
A rotary encoder can help you control your computer settings or applications more conveniently and intuitively by using physical gestures instead of mouse clicks or keyboard shortcuts.
To add a rotary encoder to your mechanical keyboard, you will need:
To buy or make a rotary encoder module that is compatible with your keyboard PCB and firmware.
You can choose from different types of rotary encoders, such as mechanical or optical, incremental or absolute, etc., depending on how they work and what features they offer.
You can also choose from different sizes and shapes for your rotary encoder knob, such as round or square, metal or plastic, etc., depending on your preference.
You can find many online stores that sell rotary encoder modules in various types and prices, such as SparkFun, Adafruit, etc.
You can also make your own rotary encoder module using some DIY materials and tools, such as this guide.
To add a rotary encoder to your mechanical keyboard, you will need to open your keyboard case and solder the rotary encoder module to the PCB.
You will also need to program the firmware of your keyboard to assign functions or macros to the rotary encoder rotation and click actions.
You can use software such as QMK Firmware or VIA Configurator for this purpose. Finally, you will need to close your keyboard case and test your rotary encoder.
Add a Custom Plate
A custom plate is a metal or plastic sheet that holds the switches in place and separates them from the PCB. A custom plate can affect the sound, feel, and stability of your switches, as well as the aesthetics of your keyboard.
To add a custom plate to your mechanical keyboard, you will need:
To buy or make a custom plate that matches your keyboard size, layout, and switch type.
You can choose from different materials, such as aluminum, brass, steel, acrylic, etc., and different colors and finishes to suit your preferences.
You can also choose between a universal or a fixed plate, depending on how much flexibility you want for your switch layout.
You can find many online stores that sell custom plates in various types and prices, such as KBDFans, Drop, etc.
You can also make your own custom plate using some DIY materials and tools, such as this guide.
To add a custom plate to your mechanical keyboard, you will need to open your keyboard case and desolder all the switches from the PCB.
Then, you will need to remove the original plate and replace it with the new custom plate. Finally, you will need to solder all the switches back to the PCB and close your keyboard case.
Keywords: custom plate, mechanical keyboard Relevant keywords: material, color, finish Semantically related keywords: keyboard sound
Add a Custom Keymap
A custom keymap is a configuration that assigns different functions or macros to each key on your mechanical keyboard.
A custom keymap can help you customize your keyboard to suit your workflow and preferences, as well as add some fun and useful features to your keyboard.
To add a custom keymap to your mechanical keyboard, you will need:
To program the firmware of your keyboard using software such as QMK Firmware or VIA Configurator.
You can create your own custom keymap using code or a graphical interface, depending on the software you use.
You can also use some online tools such as QMK Configurator or Keyboard Layout Editor to design and test your custom keymap.
To add a custom keymap to your mechanical keyboard, you will need to connect your keyboard to your computer via USB and flash the firmware with your custom keymap.
You can also use some software such as QMK Toolbox or VIA Configurator to flash the firmware without using the command line. Finally, you will need to test your custom keymap and enjoy your new keyboard functions.
Keywords: custom keymap, mechanical keyboard Relevant keywords: firmware, functions, macros Semantically related keywords: keyboard programming
Add a Custom Badge
A custom badge is a small piece of metal or plastic that has a logo, name, or design on it. A custom badge can add some personality and identity to your mechanical keyboard, as well as make it stand out from other keyboards.
To add a custom badge to your mechanical keyboard, you will need:
To buy or make a custom badge that fits your keyboard case and style.
You can choose from different materials, such as aluminum, brass, acrylic, etc., and different colors and finishes to match your preference.
You can also choose from different shapes and sizes for your custom badge, such as round or square, large or small, etc., depending on your preference.
You can find many online stores that sell custom badges in various types and prices, such as Clackeys, KeyLabs, etc.
You can also make your own custom badge using some DIY materials and tools, such as this guide.
To add a custom badge to your mechanical keyboard, you will need to open your keyboard case and remove the original badge (if any) from it.
Then, you will need to attach the new custom badge to the case using glue, screws, magnets, or other methods. Finally, you will need to close your keyboard case and admire your new custom badge.
Add a Custom Artisan Keycap
A custom artisan keycap is a keycap that has a unique and handmade design, shape, or texture on it. A custom artisan keycap can add some character and charm to your mechanical keyboard, as well as make it more fun and enjoyable to use.
To add a custom artisan keycap to your mechanical keyboard, you will need:
To buy or make a custom artisan keycap that matches your keyboard layout and switch type.
You can choose from different materials, such as resin, clay, wood, metal, etc., and different colors and themes to suit your preferences.
You can also choose from different sizes and shapes for your custom artisan keycap, such as regular or oversized, sculpted or flat, etc., depending on your preference.
You can find many online stores that sell custom artisan keycaps in various types and prices, such as Jelly Key, Dwarf Factory, etc.
You can also make your own custom artisan keycap using some DIY materials and tools, such as this guide.
To add a custom artisan keycap to your mechanical keyboard, you will need to remove one of your existing keycaps with a keycap puller and replace it with the new custom artisan keycap.
You can choose any key you want to replace, but most people prefer to use the Esc key or one of the function keys.
Add a Custom Sound Profile
A custom sound profile is a configuration that changes the sound of your mechanical keyboard when you type on it.
A custom sound profile can help you create a more pleasant and satisfying typing experience, as well as express your personality and mood through your keyboard.
To add a custom sound profile to your mechanical keyboard, you will need:
To use software such as SoundPackager or Keyboard Sounder.
You can create your own custom sound profile using sounds from your computer or online sources,
You can download and install existing sound profiles from websites such as WinCustomize or DeviantArt.
To add a custom sound profile to your mechanical keyboard, you will need to run the software and select the sound profile you want to use.
You can also adjust the volume and pitch of the sounds according to your liking. Finally, you will need to test your custom sound profile and enjoy your new keyboard sounds.
Add a Custom PCB
A custom PCB is a printed circuit board that connects the switches, LEDs, and other components of your mechanical keyboard.
A custom PCB can offer more features and options for your mechanical keyboard, such as hot-swappable sockets, RGB lighting, QMK firmware support, etc.
To add a custom PCB to your mechanical keyboard, you will need:
To buy or make a custom PCB that fits your keyboard size, layout, and case.
You can choose from different types of PCBs, such as single-sided or double-sided, through-hole or surface-mount, etc., depending on how they are designed and manufactured.
You can also choose from different colors and finishes for your PCB, such as black, white, green, etc., depending on your preference.
You can find many online stores that sell custom PCBs in various types and prices, such as KBDFans, Drop, etc.
You can also make your own custom PCB using some DIY materials and tools, such as this guide.
To add a custom PCB to your mechanical keyboard, you will need to open your keyboard case and remove the original PCB and plate from it.
Then, you will need to install the new custom PCB and plate into the case and secure it with screws or standoffs. You will also need to solder the switches and LEDs (if any) to the new PCB or use hot-swappable sockets if available.
Finally, you will need to program the firmware of your new PCB using software such as QMK Firmware or VIA Configurator.
Keywords: custom PCB, mechanical keyboard Relevant keywords: features, options Semantically related keywords: keyboard electronics
Add a Custom Lubricant
A custom lubricant is a substance that reduces friction and noise between the moving parts of your mechanical keyboard switches and stabilizers.
A custom lubricant can improve the smoothness and consistency of your switches and stabilizers, as well as enhance their sound quality.
To add a custom lubricant to your mechanical keyboard switches and stabilizers, you will need:
To buy or make a custom lubricant that suits your preferences and needs.
You can choose from different types of lubricants, such as oil-based or grease-based, thick or thin, etc., depending on how they affect the feel and sound of your switches and stabilizers.
You can also choose from different brands and grades of lubricants, such as Krytox, Tribosys, Super Lube, etc., depending on their quality and performance.
You can find many online stores that sell custom lubricants in various types and prices, such as Switchmod Keyboards, NovelKeys, etc.
You can also make your own custom lubricant using some DIY materials and tools, such as this guide.
To add a custom lubricant to your mechanical keyboard switches and stabilizers, you will need to open your keyboard case and desolder all the switches from the PCB.
Then, you will need to open each switch and apply a thin layer of lubricant to the contact points inside the switch using a small brush or applicator.
You will also need to apply some lubricant to the stabilizer wires and housings using a syringe or dropper. Finally, you will need to reassemble the switches and solder them back to the PCB.
Add a Custom Stand
A custom stand is a device or accessory that holds your mechanical keyboard at a certain angle or height. A custom stand can improve the ergonomics and comfort of your typing posture, as well as the aesthetics and stability of your keyboard setup.
To add a custom stand to your mechanical keyboard, you will need:
To buy or make a custom stand that fits your keyboard size and style.
You can choose from different materials, such as wood, metal, acrylic, etc., and different colors and designs to suit your preferences.
You can also choose between a fixed or an adjustable stand, depending on how much flexibility you want for your typing angle or height.
You can find many online stores that sell custom stands in various types and prices, such as Keychron, Grovemade, etc.
You can also make your own custom stand using some DIY materials and tools, such as this guide.
To add a custom stand to your mechanical keyboard, you will need to place your keyboard on top of the stand and adjust it to your desired position. You can also use some rubber feet or pads to prevent the stand from sliding or scratching your desk or monitor.
Add a Custom Dampener
A custom dampener is a device or material that reduces the impact and noise of your mechanical keyboard when you type on it.
A custom dampener can make your keyboard quieter and softer, as well as improve the sound quality and consistency of your switches.
To add a custom dampener to your mechanical keyboard, you will need to buy or make a custom dampener that suits your preferences and needs. You can choose from different types of dampeners, such as:
Sorbothane
This is a synthetic rubber that has excellent shock absorption and vibration damping properties. You can cut a sheet of Sorbothane to fit the bottom of your keyboard case and place it between the PCB and the case.
This will reduce the vibrations and noise that are transmitted from the keyboard to the desk or monitor.
Foam
This is a soft and flexible material that can also absorb shock and reduce noise. You can use foam sheets or strips to fill the empty spaces inside your keyboard case, such as around the PCB, plate, or stabilizers.
This will reduce the hollow sound and echo that are produced by your keyboard.
Silicone
This is a rubber-like material that can also cushion the impact and lower the noise of your keyboard. You can use silicone sheets or pads to cover the bottom of your keyboard case or the top of your PCB.
This will reduce the clack sound and rattle that are caused by your switches and stabilizers. You can find many online stores that sell custom dampeners in various types and prices, such as MKUltra, KPrepublic, etc.
You can also make your own custom dampeners using some DIY materials and tools, such as this guide.
To add a custom dampener to your mechanical keyboard, you will need to open your keyboard case and place the dampener material inside it according to your preference. You may need to cut or trim the material to fit your keyboard size and layout.
You may also need to use some glue or tape to secure the material in place. Finally, you will need to close your keyboard case and test your custom dampener.
Keywords: custom dampener, mechanical keyboard Relevant keywords: impact, noise Semantically related keywords: keyboard silence
Add a Custom Wrist Rest
A custom wrist rest is a cushioned pad that supports your wrists and palms when you type on your keyboard.
A custom wrist rest can help reduce fatigue, strain, and discomfort on your wrists and hands, as well as improve your posture and ergonomics. A custom wrist rest can also enhance the look and feel of your keyboard setup.
To add a custom wrist rest to your mechanical keyboard, you will need:
To buy or make a custom wrist rest that matches your keyboard size and style.
You can choose from different materials, such as wood, leather, foam, gel, etc., and different colors and designs to suit your preferences.
You can also choose between a fixed or adjustable wrist rest, depending on how much flexibility you want.
You can find many online stores that sell custom wrist rests in various types and prices, such as Glorious PC Gaming Race, Razer, etc.
You can also make your own custom wrist rest using some DIY materials and tools, such as this guide.
To add a custom wristrest to your mechanical keyboard, you will need to place it in front of your keyboard and adjust it to your desired position. You can also use some rubber feet or pads to prevent the wristrest from sliding or scratching your desk or monitor.
Keywords: custom wrist rest, mechanical keyboard Relevant keywords: ergonomics, comfort Semantically related keywords: keyboard accessory
Conclusion
These are some examples of how you can upgrade your mechanical keyboard and make it more personalized and enjoyable.
Of course, there are many other ways to improve your mechanical keyboard, such as adding stickers, decals, magnets, etc., depending on your creativity and imagination.
The most important thing is to have fun with your mechanical keyboard and express yourself through it. Happy typing!