Think HDR ruins your reaction time? Think again. On modern rigs, proper calibration gives you a massive visual advantage without the lag penalty.
Poor settings crush shadows and hide enemies. That ends today. We are going to fine-tune your PC to spot campers in the dark and track targets perfectly.
Stop playing with a washed-out display. Follow this guide to optimize your brightness, fix contrast, and dominate your gaming circle with crystal clarity.
Key Takeaways
- Modern HDR adds negligible input lag (roughly 0.1ms) on premium OLED and gaming monitors.
- Use the Windows 11 HDR Calibration app to fix washed-out colors and prevent crushed blacks.
- Adjust monitor OSD settings like Black Equalizer to reveal enemies hiding in dark corners.
- Set Local Dimming to ‘Medium’ to prevent blooming artifacts that obscure crosshair precision.
- Match in-game white points to your monitor’s peak nits to eliminate blinding glare in FPS games.
HDR Latency Myths: Performance Impact in Competitive Play
Competitive gamers often treat HDR like a taboo subject. The fear is simple. You worry that better graphics equal higher latency.
In the early days of 4K TVs, this was absolutely true. Heavy post-processing slowed everything down.
But display technology has evolved rapidly. On modern gaming monitors, the “HDR Lag” is now largely a myth.
Top-tier screens process HDR signals in parallel with the image refresh. This keeps your aim snappy and precise.
If you are unsure about the mechanics of delay, check our breakdown of response time vs input lag.
Let’s look at the data. Testing reveals that premium OLEDs maintain identical latency in both modes.
A bar chart showing 5.3ms latency for SDR and 5.4ms for HDR on an LG C2, compared to 85ms on an older TV.
As you can see, the difference on a proper gaming screen is negligible. It is roughly 0.1ms, which is imperceptible to humans.
However, there are specific scenarios where HDR will hurt your performance. You must avoid these setups.
When HDR Causes Lag
You should only worry about input lag if your hardware falls into specific categories.
- TVs without Game Mode: Standard picture modes apply heavy processing. This can add over 50ms of delay.
- Windows Auto HDR: Forcing HDR on older DirectX 11 titles can introduce system-level overhead.
- Budget Local Dimming: Cheap monitors with slow backlight zones take time to adjust brightness.
If you use an OLED, you are generally safe. These panels switch pixels instantly, regardless of the dynamic range.
For those debating panel types, our guide on OLED vs TN motion clarity explores this speed advantage further.
Test your setup. If your mouse feels “floaty” in HDR, check your monitor’s firmware settings immediately.
In Short
- Modern gaming monitors and premium OLEDs process HDR signals with negligible latency differences compared to SDR modes.
- Data indicates that on high-end screens, the input lag variance is roughly 0.1ms, which is imperceptible to humans.
- Significant HDR latency is mostly restricted to specific scenarios like TVs without Game Mode, budget monitors with slow local dimming, or Windows Auto HDR on older games.
Visibility-First Calibration: Windows 11 & Monitor OSD
You cannot hit what you cannot see. In competitive gaming, visibility trumps cinematic beauty every single time.
Default HDR often crushes shadows or blows out highlights. This makes enemies hiding in dark corners invisible. You need to fix this now.
Step 1: The Windows 11 HDR Calibration App
Windows 11 creates a generic tone map by default. It is usually wrong for your specific panel. You need a custom profile.
Download the “Windows HDR Calibration” app from the Microsoft Store. This utility communicates your panel’s actual limits to the OS.
Calibrating for Competitive Advantage
Launch the app and follow the on-screen patterns. However, you must prioritize enemy visibility over “inky” blacks.
- Minimum Luminance: Adjust until the grid disappears, then increase it slightly. You want to see movement in the shadows.
- Maximum Luminance: Push the slider until the pattern vanishes. This ensures flashbangs don’t blind you completely.
- Color Saturation: Keep this conservative. Oversaturated colors bleed together and obscure target outlines.
Once saved, this profile creates a baseline. Now, Windows knows exactly what your hardware can handle.
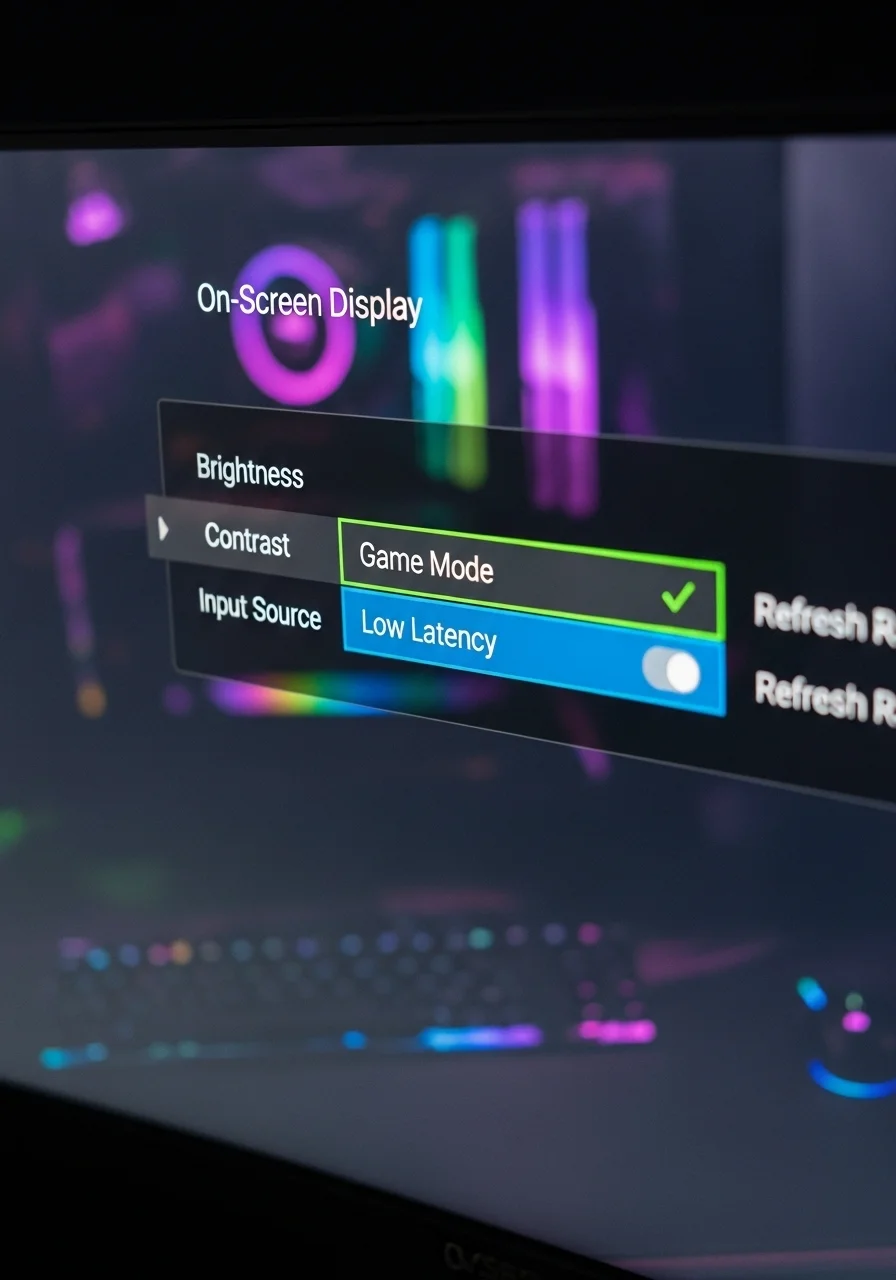
Step 2: Monitor OSD Configuration
Your hardware settings override software. Open your On-Screen Display (OSD) menu using the buttons on your monitor.
Locate the “Game Mode” or “Picture” settings. Many gaming monitors lock brightness controls when HDR is active.
If your monitor allows it, tweak the Black Equalizer or Shadow Boost. This lifts dark areas without washing out the rest.
Check your monitor settings for visibility carefully. Every panel is different.
Understanding VESA DisplayHDR Tiers
Not all HDR is built the same. Your peak brightness determines how aggressively you can calibrate without clipping details.
A bar chart comparing peak brightness requirements for VESA DisplayHDR tiers: 400, 600, 1000, and 1400 nits.
Competitive HDR Settings Checklist
Use the following settings as a starting point. Adjust based on your specific game’s lighting engine.
| Setting | Cinematic Mode | Competitive Mode |
|---|---|---|
| Contrast | High (Dynamic) | Medium (Static) |
| Shadow Detail | Dark/Inky | Lifted/Visible |
| Sharpness | Low/Soft | Medium/Crisp |
| Local Dimming | High | Low/Medium |
High local dimming can cause “blooming” around crosshairs. This halo effect ruins your precision in dark scenes.
After adjusting these, use our display color calibration tool. It verifies that your colors remain distinct.
Test these settings in a custom lobby. Throw a smoke grenade or stand in a dark corner. If you can track targets clearly, you are ready.
Adjusting Local Dimming to Prevent Shadow Crushing
Local dimming technology is a double-edged sword for competitive gamers. It makes HDR look stunning by deepening blacks.
However, if the dimming algorithm is too aggressive, it creates “shadow crush.” This merges dark gray details into pure black.
In a fast-paced FPS, this disaster means you cannot see an enemy hiding in a dark corner. You need to find the right balance.
Finding the Sweet Spot
Most modern Mini-LED or FALD monitors offer different strength settings for local dimming. Usually, these are High, Medium, or Low.
You might think “High” is best for HDR, but for spotting targets, it is often the worst choice. It reacts too slowly to movement.
Check the breakdown below to understand how these settings impact your competitive edge.
| Dimming Level | Visual Impact | Competitive Advantage |
|---|---|---|
| High | Inky blacks, minimal blooming. | Low. Crushes shadow detail; fast-moving objects may disappear. |
| Medium | Balanced contrast and brightness. | High. Retains detail without washing out the image. Usually ideal. |
| Low/Off | Grayish blacks, high brightness. | Medium. Maximum visibility, but the HDR image looks flat and washed out. |
To visualize how much detail you are losing, run our Display Black Level Test.
If the dark gray squares in the test blend into the background, your dimming is too strong. Dial it back immediately.
The Contrast vs. Visibility Trade-off
Local dimming massively increases contrast ratios, which is why manufacturers push it. But raw numbers do not equal wins.
The chart below illustrates the massive jump in contrast when dimming is active. This highlights why the image changes so drastically.
A bar chart showing the contrast jump from ~1100:1 (Native) to ~18500:1 with Local Dimming on High.
While that high number looks great on a spec sheet, it introduces latency in the backlight response. This creates trailing artifacts.
For the best results, stick to “Medium” or “Standard” on most gaming monitors. This preserves the best monitor settings for visibility in dark games.
Always prioritize your ability to track targets over cinematic immersion when you are climbing the ranked ladder.
In Short
- Use the Windows 11 HDR Calibration app to create a custom profile that prioritizes enemy visibility in shadows over cinematic deep blacks.
- Adjust monitor OSD settings, specifically Black Equalizer, to lift dark areas without washing out the image.
- Set local dimming to Medium or Low to prevent shadow crush and blooming that can obscure targets in competitive play.
In-Game HDR Configuration: CoD and Apex Legends Guide
You have calibrated Windows. Now it is time to optimize the games themselves. Poor in-game settings will ruin your hard work.
Every engine handles dynamic range differently. We will focus on two of the biggest competitive shooters: Call of Duty and Apex Legends.
Call of Duty: Modern Warfare III & Warzone
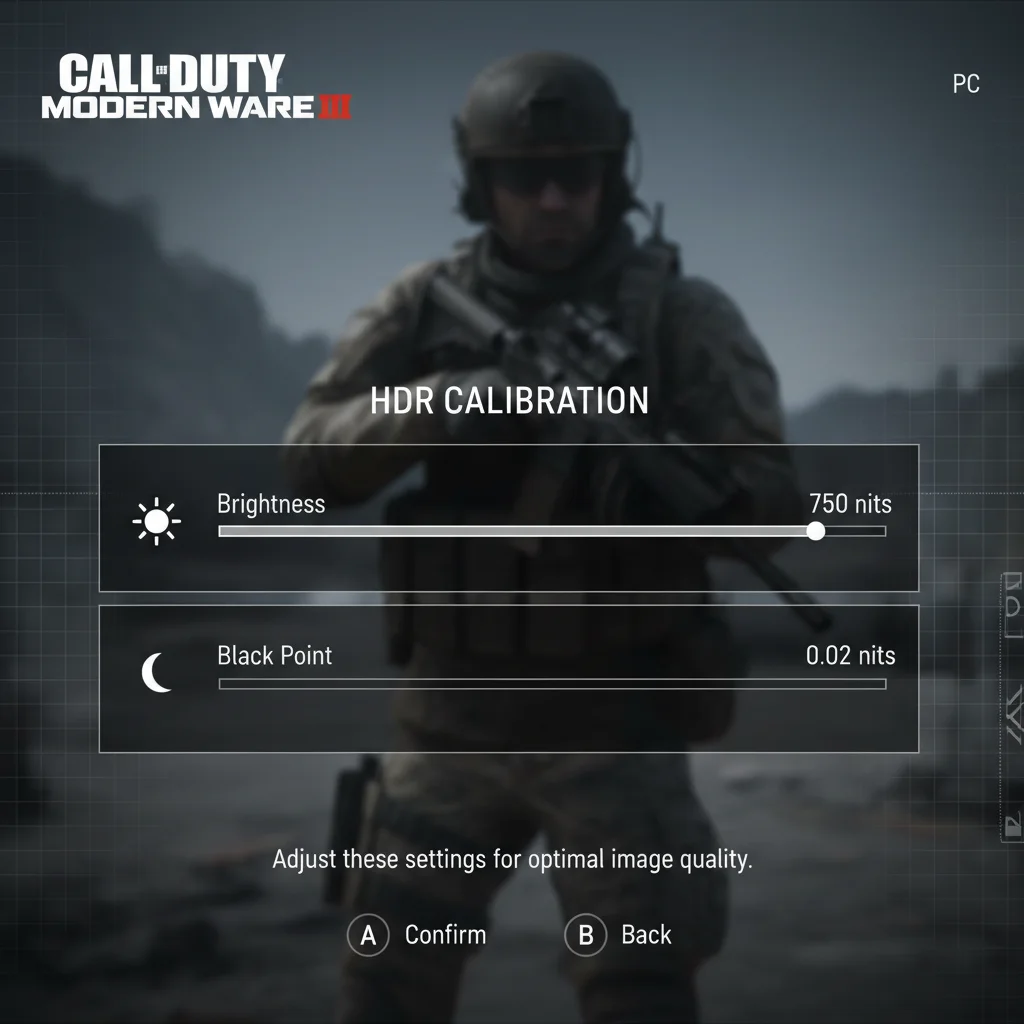
CoD has a dedicated calibration menu. This is great for fine-tuning your visibility. First, ensure HDR is enabled in your Windows settings.
Launch the game and go to the Graphics tab. Select the Display submenu. Scroll down to find HDR Calibration.
You will see three specific sliders. Adjusting these correctly is vital for spotting enemies in dark corners.
Follow these specific targets based on your hardware capabilities:
| Setting | OLED Monitor | IPS / TN (HDR400) | Competitive Goal |
|---|---|---|---|
| HDR Brightness | 1.0000 (or Max Nits) | 0.8500 – 0.9000 | Max contrast punch |
| HDR Black Point | 0.0000 (Pure Black) | 0.0100 – 0.0200 | Shadow visibility |
| HDR White Point | Match Peak Nits | Match Peak Nits | Avoid highlight clipping |
Do not crush your blacks completely.
You need to see movement in the shadows.
Use our Display Black Level Test to double-check your screen before launching the game.
Apex Legends: The Windows Reliance
Apex Legends on PC is different. It lacks the detailed internal sliders found in CoD. It relies heavily on the Windows OS signal.
To get HDR working in Apex, you must toggle “Use HDR” in Windows Display Settings before launching. The game detects this signal automatically.
If the colors look washed out, the issue is usually your gamma. Apex does not let you adjust gamma while HDR is active in fullscreen exclusive mode.
You might need to switch to “Borderless Windowed” to force the game to respect your desktop color profile. This can add slight input lag.
For the best experience, competitive players often use monitors with high peak brightness. This allows for distinct highlights without graying out darks.
Check out this data on brightness standards. It shows why higher certification tiers matter for game visibility.
A bar chart showing the peak luminance requirements for VESA DisplayHDR tiers, ranging from 400 nits to 1400 nits.
The Competitive Trade-Off
Remember that HDR is visual candy. It makes explosions look incredible. However, it can sometimes obscure targets.
If you are struggling to track targets, consider your panel type. Our OLED vs TN comparison explains why OLEDs handle these dynamic shifts better.
Test your settings in a private match. Look at the sky and then quickly look into a dark hallway. The transition should be smooth, not blinding.
Fine-Tuning White Points to Eliminate Glare
Blinding lights in games ruin your aim. If your white point is too high, bright areas lose all detail. This is a disaster for tracking targets.
Imagine looking into the sun in Apex Legends. If your HDR isn’t tuned, the enemy silhouette vanishes into a white blob.
This issue is called “clipping.” It happens when your GPU sends a signal brighter than your monitor can physically display.
Match Your Monitor’s Peak Nits
Your monitor has a maximum brightness limit. This is measured in nits. You must cap your HDR output to match this exact number.
If you push past this limit, you gain nothing. You only lose visual information. This puts you at a disadvantage in competitive play.
Check the chart below to understand the peak brightness targets defined by VESA standards. Know your hardware’s tier.
A bar chart showing VESA DisplayHDR standards ranging from 400 to 1400 nits peak brightness.
Calibration Steps for Victory
You need to fix this immediately. Use the Windows HDR Calibration app or your monitor’s OSD. Follow this strict protocol.
- Find the Limit: Increase the “Maximum Luminance” slider slowly. Watch the test pattern closely.
- Stop at the Vanishing Point: Stop exactly when the white box disappears into the background. Do not go further.
- Back It Off: Move the slider back one notch. The box should be barely visible. This preserves highlight detail.
Many gamers mistake panel defects for HDR issues. Ensure you aren’t fighting hardware limits by reading our guide on IPS glow vs backlight bleed.
Signs of Poor White Point Settings
How do you know if your settings are wrong? Use this checklist to diagnose your current setup.
| Symptom | The Problem | The Fix |
|---|---|---|
| Cloud Texture Loss | White Point too high (Clipping) | Lower Max Luminance slider. |
| Dull / Grey Whites | White Point too low | Increase Max Luminance to monitor spec. |
| Eye Strain | Overall brightness too high | Adjust “Paper White” balance. |
Correct white points let you spot snipers in bright windows. It gives you the clarity you need to react faster than the competition.
Once you dial this in, verify your panel’s color accuracy. Use our Display Color Calibration Tool to ensure your colors remain distinct.
Don’t let glare hide your next kill. Calibrate your white point now and dominate the lobby.
In Short
- Call of Duty allows for detailed internal HDR calibration, whereas Apex Legends relies on Windows settings and may require borderless mode to fix color issues.
- To prevent highlight clipping and maintain target visibility, players must match the in-game HDR white point to their monitor’s specific peak brightness limit.
- Competitive players should balance settings to ensure smooth light transitions and avoid crushing blacks, as poor HDR configuration can obscure enemies.