Is your Ryzen rig stuttering mid-game? That random audio crackle and lag spike isn’t just annoying; it’s costing you the win in competitive matches.
The culprit is likely your firmware TPM (fTPM). Don’t panic. We have the data-driven fix to smooth out your frame times and restore crystal-clear audio.
Key Takeaways
- Ryzen fTPM operations cause random micro-stutters and audio crackling in Windows 11.
- Update your BIOS to AGESA V2 PI 1.2.0.7 or newer to permanently fix the firmware bug.
- Verify your current firmware and AGESA version using the CPU-Z hardware tool.
- Alternatively, install a discrete TPM (dTPM) module to bypass the fTPM bottleneck.
- Validate your system stability post-fix with the Joltfly Mouse Latency Test.
Diagnosing Ryzen fTPM Stutter: Audio Crackling, Lag Spikes, and Root Causes
Unmasking the Ryzen fTPM Stutter: Symptoms and Signals
You’re in the middle of a clutch play, your reflexes honed, every movement precise. Then, disaster strikes: a sudden micro-stutter.
You might notice audio crackling or a brief lag spike. This isn’t just annoying, it’s game-breaking.
For many competitive gamers running AMD Ryzen systems, these interruptions point to a common culprit.
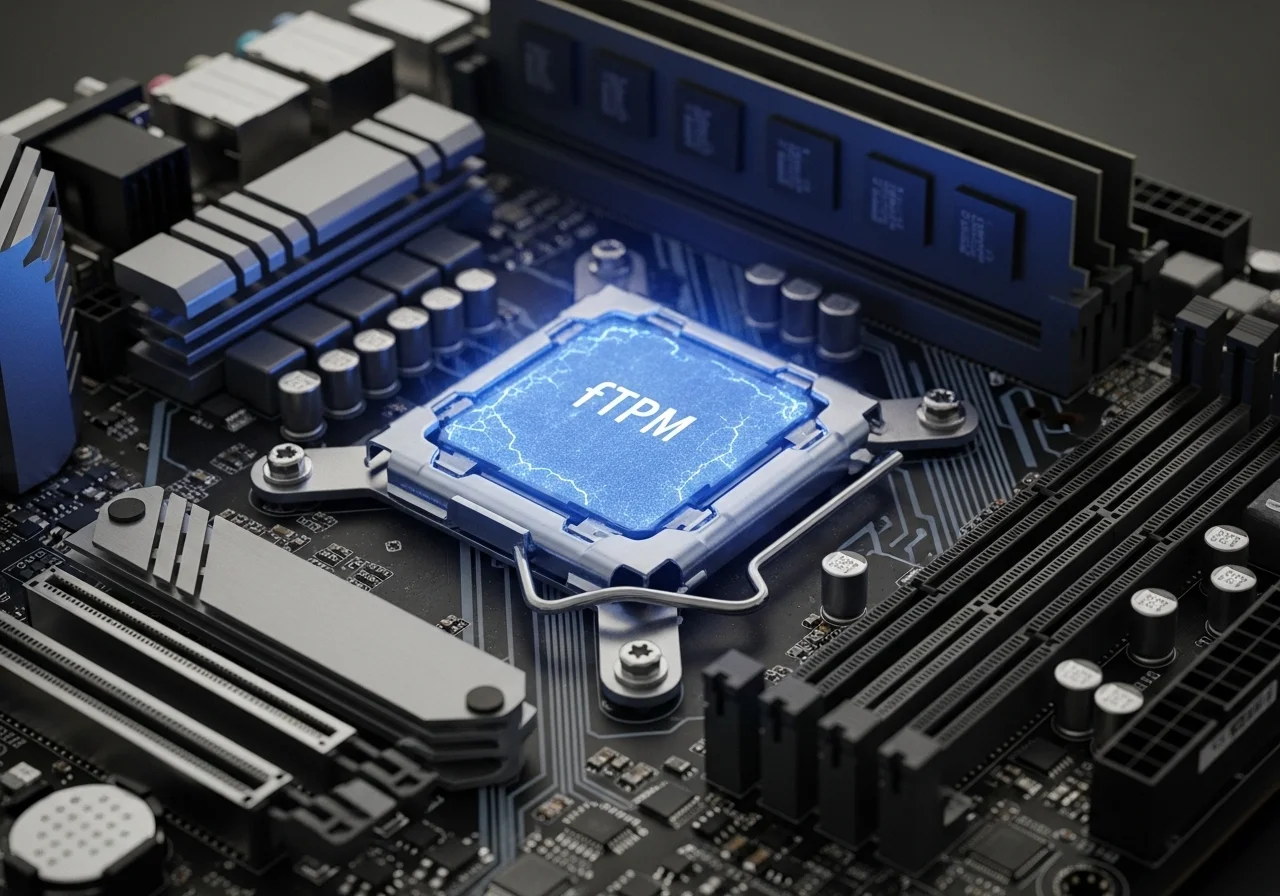
It is the firmware-based Trusted Platform Module, or fTPM.
What Does fTPM Stutter Feel Like in Game?
The symptoms of fTPM stutter are distinct and disruptive. They sabotage your performance and break your immersion.
- Audio Crackling: Your crucial in-game comms or environmental cues become garbled or briefly cut out. This can severely impact situational awareness, especially in titles where sound is critical for detecting enemy positions. If you’re also dealing with other audio issues, check out our guide on how to fix audio crackling caused by high polling rate mice.
- Micro-Stutters: Your smooth gameplay freezes for a fraction of a second, then resumes. This can lead to missed shots, mistimed abilities, or even running into enemy fire unexpectedly.
- Lag Spikes: Similar to micro-stutters, but often more noticeable, with the game visibly freezing for up to a second or two. These can happen seemingly at random, costing you critical moments.
- Input Delay: Sometimes, these stutters can manifest as temporary input lag, where your mouse clicks or keyboard presses register late. This is deadly in fast-paced FPS games.
These issues typically occur intermittently. This makes them hard to diagnose without a keen eye and ear.
The Technical Roots of fTPM Performance Dips
So, why does fTPM cause these maddening stutters? The issue stems from how your system handles fTPM operations.
When Windows requires a cryptographic key or operation from fTPM, it can temporarily halt other CPU processes.
This brief pause, often lasting milliseconds, is what you perceive as a stutter or audio crackle.
This challenge is particularly prevalent in systems running Windows 11. The OS heavily relies on TPM 2.0 for security features.
Older BIOS versions or outdated chipset drivers can exacerbate these problems. They often fail to efficiently manage these brief fTPM requests.
A significant portion of PC performance issues can be traced back to software or operating system glitches, as this data indicates:
A bar chart showing the top causes of PC performance issues in the U.S. in 2021. Too many applications running (49%), too many browser tabs open (47%), viruses/malware (36%), software/operating system issues (35%), and not enough RAM (34%).
Initial Diagnostic Steps to Pinpoint the Problem
Before diving into fixes, you need to confirm fTPM is truly the culprit. Eliminate other common stutter sources first.
Follow these steps to narrow down the issue:
- Check Your Drivers: Ensure your graphics card, audio drivers, and especially your AMD chipset drivers are all up to date. Outdated drivers are a frequent cause of instability.
- Monitor System Resources: Use Task Manager or a more advanced tool like HWiNFO to check CPU, GPU, and RAM usage during a stutter event. Look for any spikes or bottlenecks that don’t align with fTPM behavior.
- Test with fTPM Disabled (Temporary): As a diagnostic step, you can temporarily disable fTPM in your BIOS/UEFI settings. Be aware this may impact Windows 11 functionality and security features. If the stuttering stops, fTPM is likely the cause.
- Isolate Audio: If audio crackling is prominent, try different audio devices or connections. Test onboard audio versus a dedicated sound card or USB headset to rule out specific hardware.
By systematically checking these areas, you’ll gain a clearer picture. You will know if fTPM is holding back your competitive edge.
In Short
- Ryzen fTPM stutter causes disruptive micro-stutters, audio crackling, lag spikes, and input delay for gamers.
- This stutter occurs when fTPM operations temporarily halt CPU processes, especially in Windows 11 systems, often due to outdated drivers.
- Diagnosing involves updating drivers, monitoring system resources, temporarily disabling fTPM, and isolating audio to confirm the cause.
Primary Fix: Updating Firmware to AGESA V2 PI 1.2.0.7 or Newer
Eliminate Stutter and Crackle with the Right Firmware
You’ve experienced it, that frustrating micro-stutter and audio crackle. It pulls you right out of the game.
For many AMD Ryzen users leveraging fTPM, this isn’t just an annoyance. It is a performance killer.
The good news is there’s a definitive solution. You can reclaim your smooth gameplay and crystal-clear audio.
The Critical AGESA Update You Need
The primary culprit behind Ryzen fTPM stuttering was identified as a bug. It existed within the firmware itself.
AMD addressed this with a crucial update to their AGESA microcode. You need AGESA V2 PI 1.2.0.7 or newer.
This update is integrated into your motherboard’s BIOS or UEFI firmware.
Updating your BIOS is non-negotiable for stable, lag-free performance with fTPM enabled.
Why This Firmware is a Game Changer
AGESA V2 PI 1.2.0.7 specifically targets the intermittent stuttering. It resolves the audio degradation that plagued systems using the fTPM module.
Without this update, your competitive edge suffers. You face unpredictable hitches and distracting sound interruptions.
Imagine perfectly timed movements and clear callouts. You can play without a sudden drop in responsiveness or audio quality.
For gamers, eliminating these random stutters is vital. It boosts your reaction time and overall system consistency.
It’s similar to optimizing other latency factors, ensuring every input counts.
This firmware fix dramatically reduces audio crackling. It maintains fluid frame delivery, which is vital for dominating your gaming circle.
Step-by-Step BIOS Update Guide
Ready to banish those stutters for good?
Follow these steps carefully to update your motherboard’s BIOS. This integrates the essential AGESA V2 PI 1.2.0.7 or newer firmware.
A successful update will unlock stable performance.
- Identify Your Motherboard Model: Use software like CPU-Z or physically check your motherboard. Know your exact model.
- Visit Manufacturer’s Website: Go to your motherboard manufacturer’s official support page (e.g., ASUS, MSI, Gigabyte, ASRock).
- Locate BIOS/UEFI Section: Find the downloads or support section for your specific motherboard model.
- Download Latest BIOS: Look for the latest BIOS version. Crucially, verify that it includes AGESA V2 PI 1.2.0.7 or a newer iteration.
- Prepare a USB Drive: Format a USB drive to FAT32. Extract the downloaded BIOS file to the root directory of the USB.
- Enter BIOS/UEFI: Restart your PC and repeatedly press the designated key (often Del, F2, F10, or F12) to enter the BIOS/UEFI setup.
- Use Flash Tool: Navigate to the “EZ Flash,” “M-Flash,” “Q-Flash,” or similar utility within your BIOS/UEFI.
- Select BIOS File: Choose the BIOS file from your USB drive and confirm the update process.
- DO NOT Interrupt: Let the process complete without interruption. Your system will restart automatically.
Once updated, re-enter your BIOS to ensure fTPM is still enabled and your settings are optimized.
Verify Your Fix and Dominate
After the BIOS update, boot into Windows and test your system.
Monitor for any lingering stuttering or audio crackling.
You should immediately notice a smoother experience. You will be free from those irritating hitches that previously plagued your gameplay.
Head over to Joltfly and challenge your skills with our Reaction Time Test. See your newfound stability translate into competitive gains.
Don’t let firmware issues hold you back. Update, optimize, and dominate!
Step-by-Step: Verifying Current BIOS and AGESA Version via CPU-Z
Why Knowing Your BIOS and AGESA is Key
Your PC’s BIOS and AGESA versions are critical for peak gaming performance.
Outdated firmware can lead to frustrating issues like fTPM stuttering and audio crackle.
Knowing your current versions is the first step towards a stable, high-performance rig. It helps you identify if a firmware update is needed.
Get CPU-Z: Your Hardware Detective
CPU-Z is a lightweight, powerful utility. It provides detailed information about your system’s hardware.
This tool is essential for competitive gamers who demand precision.
This free tool will instantly show you your motherboard’s BIOS version. It also displays the AGESA version running on your AMD CPU.
Downloading and Installing CPU-Z
Step 1: Download CPU-Z. Visit the official CPU-Z website to download the latest version.Always use the official source to ensure security. You can find it at cpuid.com.
Step 2: Install the Application. Run the downloaded installer.Follow the on-screen prompts for a quick and straightforward installation.
Step 3: Launch CPU-Z. Once installed, launch the CPU-Z application.It might take a few seconds to scan your hardware.
Locating BIOS and AGESA Versions
With CPU-Z open, navigating to the correct tabs is simple. You’ll find all the crucial information displayed clearly.
Using the Mainboard Tab
Click on the “Mainboard” tab within the CPU-Z interface. This section is your go-to for motherboard details.
Look for the “BIOS” section. Here, you will see your BIOS brand, version number, and date. Note these down.
Identifying the AGESA Version
The AGESA version is often embedded within the BIOS version string or listed nearby. For AMD systems, AGESA is vital.
It stands for AMD Generic Encapsulated Software Architecture. It manages fundamental CPU functions.
Keep an eye out for “AGESA” followed by a version number. For example, “AGESA V2 PI 1.2.0.7.”
What Your Versions Mean for Gaming
Understanding these numbers helps you determine if your system is optimized.
Newer AGESA versions often bring performance enhancements, stability fixes, and improved compatibility.
Outdated BIOS or AGESA could be the root cause of your issues. They cause the fTPM stuttering and audio crackle you’re experiencing.
These issues can drastically impact your in-game performance.
Optimizing your chipset drivers can also have a big impact. Learn how chipset drivers affect gaming performance and stability.
Next Steps: Update or Confirm
Once you have your BIOS and AGESA versions, compare them against your motherboard manufacturer’s website.
They usually list the latest firmware updates available for your specific model.
If your versions are outdated, a BIOS update might be necessary to resolve the stuttering.
Be cautious and follow your manufacturer’s instructions precisely.
Test Your System’s Responsiveness on Joltfly
After verifying your firmware and performing any necessary updates, it’s time to measure the improvements.
Head over to Joltfly and try our Mouse Latency Test.
You can also challenge your friends with the Reaction Time Test.
See who has the fastest reflexes post-optimization!
In Short
- AMD Ryzen fTPM stuttering and audio crackle issues are resolved by updating motherboard firmware to AGESA V2 PI 1.2.0.7 or newer.
- This critical BIOS update eliminates intermittent stuttering and audio degradation, significantly improving gaming performance and system consistency.
- Users must carefully follow a multi-step process to update their motherboard’s BIOS to achieve stable, lag-free performance.
Alternative Solution: Disabling fTPM and Installing a Discrete TPM (dTPM)
Why Consider a Discrete TPM for Gaming Stability?
Your Ryzen system might be struggling with fTPM-induced stutters and audio crackles. This isn’t just an annoyance, it impacts your gameplay.
When every millisecond counts, interruptions are game-breaking. A discrete TPM (dTPM) offers a powerful alternative.
It can provide the security features Windows 11 demands without the performance hit associated with fTPM.
The fTPM Stutter Challenge
Firmware TPM (fTPM) on AMD Ryzen platforms can sometimes cause unexpected pauses. These micro-stutters manifest as audio crackling and brief freezes.
They are especially frustrating in fast-paced competitive games. You need consistent, buttery-smooth performance to dominate.
The root cause often lies in how fTPM handles cryptographic operations. It can briefly interfere with other system processes.
The dTPM Advantage: Smooth Performance
A discrete TPM is a separate chip on your motherboard. It handles security tasks independently from your CPU.
This dedicated hardware can significantly reduce the performance overhead. It prevents the resource conflicts that cause fTPM stutter.
For competitive gamers, this means a more stable system and zero distracting audio glitches.
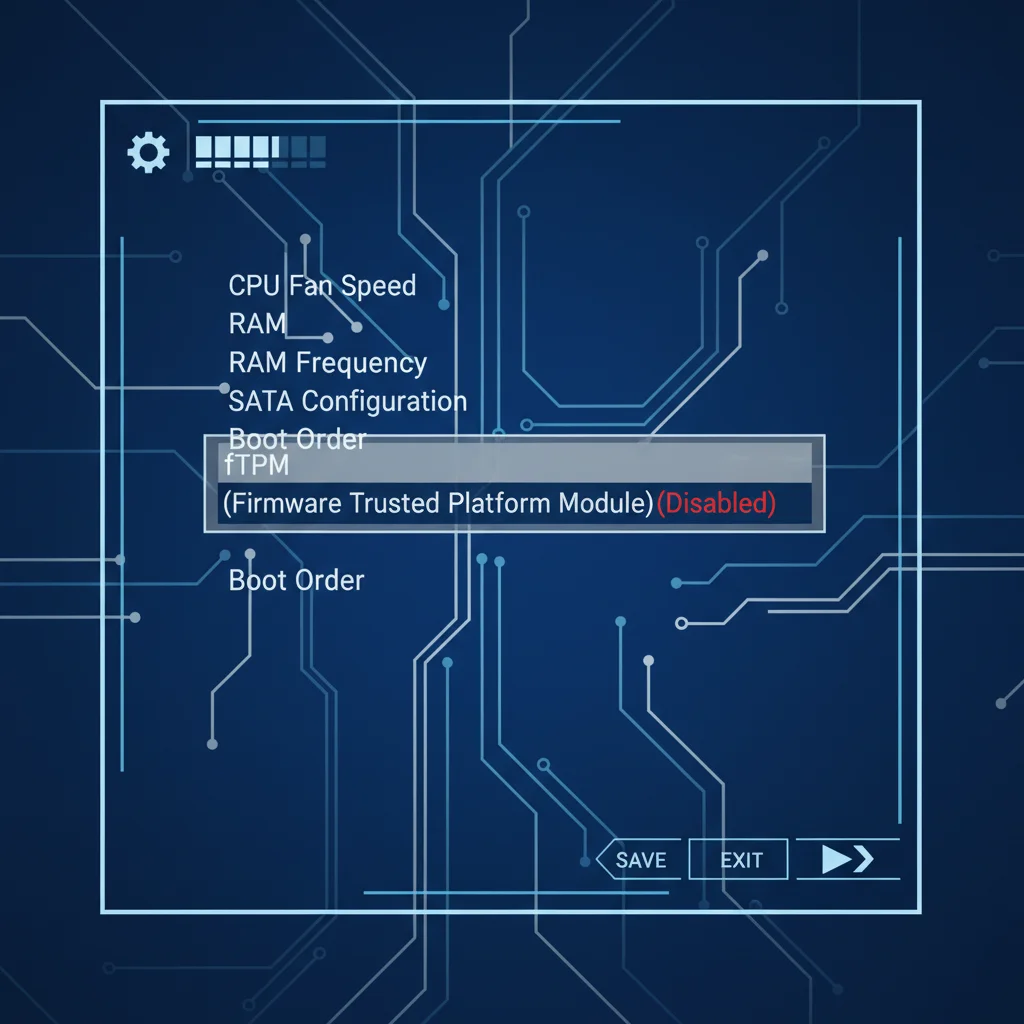
Step-by-Step: Disabling fTPM in BIOS
Ready to reclaim your flawless gaming experience? Disabling fTPM is your first move.
Access your motherboard’s BIOS/UEFI settings. This usually involves pressing DEL or F2 during boot-up.
Navigate to the “Security” or “Advanced” section. Exact menus vary by motherboard manufacturer.
- Reboot Your System: Restart your PC and repeatedly press the BIOS key.
- Locate fTPM Setting: Find an option like “AMD fTPM switch,” “Trusted Platform Module,” or similar.
- Disable fTPM: Change the setting from “Enabled” to “Disabled.”
- Save and Exit: Save your changes and reboot your system.
Installing a Discrete TPM Module
If your motherboard supports it, installing a dTPM is straightforward. Consult your motherboard manual first.
Look for a dedicated TPM header on the motherboard itself. It’s usually a small, multi-pin connector.
Purchase a dTPM module compatible with your motherboard’s header. Compatibility is crucial for proper function.
- Power Down: Completely shut down and unplug your PC from the wall.
- Static Protection: Use anti-static precautions before handling any internal components.
- Locate Header: Find the dedicated TPM header on your motherboard, usually near the PCIe slots.
- Install Module: Carefully align the dTPM module with the header pins and press it firmly into place.
- Reassemble and Boot: Close your PC case, plug it back in, and power it on.
Verifying dTPM and Windows 11 Compatibility
Once installed, boot into Windows. Open “Run” (Win+R) and type tpm.msc.
This will open the TPM Management Console. Verify that your discrete TPM is recognized and operational.
Windows 11 requires a TPM 2.0. A discrete module usually fulfills this requirement flawlessly.
This ensures you meet OS security needs without fTPM performance issues.
According to a TechRadar Pro article, many systems fall short. An estimated 20% of Windows 10 PCs do not meet the TPM 2.0 requirement.
A pie chart showing that an estimated 20% of Windows 10 PCs do not meet the TPM 2.0 requirement for Windows 11.
By implementing a dTPM, you actively eliminate a potential source of stutter. This directly translates to smoother gameplay and clearer audio.
You’re empowering your rig for peak performance. Don’t let anything hold back your competitive edge!
Benchmark your improvements and challenge your friends in your gaming circle!
BIOS Navigation Guide: Locating fTPM on ASUS, MSI, Gigabyte, and ASRock Boards
Accessing Your BIOS: The Gateway to Performance
Diving into your BIOS is the first critical step. It helps resolve fTPM-related stutters and audio crackles.
This is where you gain direct control over your hardware. Stable performance is non-negotiable in competitive gaming.
Typically, you enter the BIOS by pressing Delete or an F key immediately after powering on. Timing is key, so tap the key repeatedly.
Navigating fTPM Settings on Popular Motherboards
The exact path to fTPM settings varies between manufacturers. Don’t worry, we’ll guide you through the common routes.
We will cover ASUS, MSI, Gigabyte, and ASRock boards. You’ll unlock smoother gameplay in no time.
Locating the fTPM option is essential for stability. Disabling it or updating your BIOS can resolve those annoying audio glitches.
| Motherboard Brand | Common BIOS Path | Key Terms to Locate |
|---|---|---|
| ASUS | Advanced > PCH-FW Configuration | TPM Device Selection, Trusted Computing, Security Device Support |
| MSI | Settings > Security > Trusted Computing | Security Device Support, AMD fTPM Switch |
| Gigabyte | Settings > Miscellaneous | AMD fTPM switch, Trusted Platform Module |
| ASRock | Advanced > CPU Configuration | AMD fTPM Switch, Intel Platform Trust Technology |
ASUS Boards: Precision Tuning for Your Gaming Rig
For ASUS users, start in the Advanced mode. Look for a section often labeled PCH-FW Configuration.
Within this, you’ll typically find an option for TPM Device Selection or Security Device Support.
Ensure the setting is either disabled or configured to address the stuttering. Sometimes, updating your BIOS is the ultimate fix for these issues.
MSI Boards: Securing Your System’s Performance
MSI motherboards usually house fTPM settings under Settings. Navigate to Security, then Trusted Computing.
Inside, look for Security Device Support or a similar AMD fTPM switch option.
Toggling this setting can eliminate audio crackles. Ensure your BIOS is up-to-date to stop in-game stutters that hold you back.
Gigabyte Boards: Optimizing Your Powerhouse
Gigabyte users will want to head to Settings in the BIOS. From there, locate the Miscellaneous section.
You should find the AMD fTPM switch directly.
It might also be under a more general Trusted Platform Module heading. Adjusting this setting is key to a stable gaming experience.
ASRock Boards: Unleashing Raw Performance
On ASRock boards, your fTPM control is typically found under the Advanced tab. From there, navigate to CPU Configuration.
Look for the AMD fTPM Switch.
For Intel systems, you might see Intel Platform Trust Technology (PTT). Adjusting this setting can make a huge difference.
After making any changes, remember to save and exit your BIOS. Reboot your system and test for improvements.
If you’re still experiencing stuttering, investigate further. You might need to address other causes of stuttering.
For persistent audio issues, explore options to optimize your audio setup further.
Ready to push your limits beyond just hardware fixes? Head over to Joltfly and challenge your speed with our Click Speed Test.
You can also refine your precision with the Aim Trainer. Prove your skills and dominate your gaming circle.
In Short
- AMD Ryzen systems can suffer from fTPM-induced stutters and audio crackles, negatively impacting gaming performance.
- A discrete TPM (dTPM) is a separate chip that can resolve these issues by handling security tasks independently, leading to smoother gameplay.
- Users can improve system stability by disabling fTPM in BIOS and installing a compatible dTPM module to meet Windows 11 requirements without performance hits.
Game Without Glitches
Don’t let random stuttering ruin your killstreak. You now have the knowledge to fix that annoying fTPM lag for good.
Update your BIOS or tweak your settings to reclaim smooth gameplay. Take control of your rig today.
Get back in the lobby and dominate your matches without interruptions!
Frequently Asked Questions
What exactly causes the fTPM stutter?
It is a temporary communication lag between the processor and the fTPM module. This results in brief system freezes.
Is it safe to disable fTPM?
Yes, for most older OS builds. However, Windows 11 and games like Valorant often require it to run.
Will a BIOS update fix this permanently?
Yes. AMD released specific updates (AGESA 1.2.0.7 or newer) designed to eliminate this performance bug.