Table of Contents
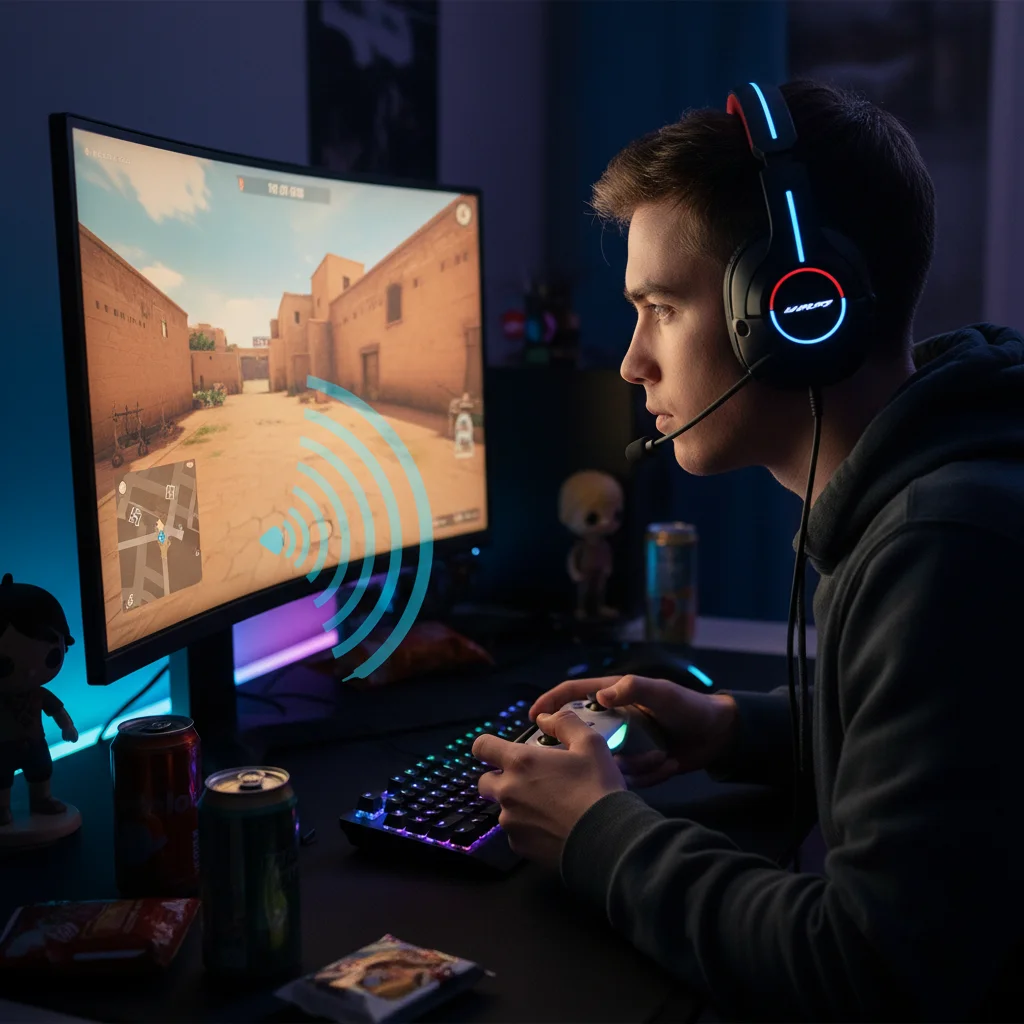
Stop getting flanked by silent enemies. In competitive gaming, clear audio intel is your ultimate weapon. You need to hear every step before they see you.
Windows Loudness Equalization amplifies footsteps while suppressing explosions. Optimize this setting now to gain an unfair advantage and dominate your lobby.
Key Takeaways
- Enable Loudness Equalization to drastically amplify quiet enemy footsteps while compressing ear-shattering explosions.
- Adjust the ‘Release Time’ setting in the Windows Registry to zero for instant audio recovery after gunshots.
- Troubleshoot missing Enhancement tabs by installing specific Realtek UAD drivers to unlock full audio control.
- Test your enhanced auditory reaction times on Joltfly and prove your edge over the competition.
Enabling Windows Loudness Equalization for Competitive Gaming
Unlock Critical Audio Cues with Loudness Equalization
In competitive gaming, every sound matters. Footsteps, reloads, or distant abilities can be the difference between victory and defeat.
Windows Loudness Equalization gives you an unfair advantage.
It balances audio levels, making quiet sounds like footsteps significantly louder.
Simultaneously, it compresses loud sounds. This prevents ear-shattering explosions from overwhelming you.
The result is clearer audio cues, less auditory fatigue, and an enhanced ability to detect enemies.
Step-by-Step: Activating Loudness Equalization
Ready to boost your game sense? Enabling Loudness Equalization is a quick process.
- Right-click the speaker icon in your Windows taskbar.
- Select Sound settings or Open Sound settings.
- Under the “Output” section, click on Device properties for your primary gaming headset or speakers.
- In the new window, navigate to the Enhancements tab.
- Check the box next to Loudness Equalization.
- Click Apply, then OK.
That’s it! Your audio is now optimized to highlight those crucial enemy movements.
Why This Audio Boost is a Game Changer
Think about those intense clutch moments. Can you hear the subtle shuffle of an opponent pushing your flank?
With Loudness Equalization, you absolutely can.
This setting helps overcome the dynamic range limitations of many games.
It ensures even the quietest sounds are audible.
You won’t need to crank your volume to dangerous levels, preserving your hearing and focus.
For further audio precision, explore specific best EQ settings for footsteps to truly dominate.
Impact on Competitive Play: Data Speaks Volumes
The importance of superior audio in competitive gaming cannot be overstated.
Hearing your enemy before they hear you provides a critical edge.
A 2021 Razer study revealed that 80% of esports players agree audio is critical in competitive gaming.
This data clearly shows how vital sound optimization is for gaining a true advantage.
A pie chart showing that 80% of competitive gamers consider audio critical, according to a Razer study.
Fine-Tuning Your Sound Advantage
While Loudness Equalization is powerful, consider pairing it with other audio optimizations.
Ensure your gaming headset or IEMs are configured correctly for spatial audio.
Many games also offer in-game audio settings that can further enhance positional awareness.
Experiment with these settings to find your perfect balance and gain an even greater tactical advantage.
Test Your Enhanced Hearing on Joltfly
Now that your audio is dialed in, it’s time to test your reaction to those newly amplified sounds.
Head over to Joltfly’s Reaction Time Test to see how quickly you respond to stimuli.
Challenge your squad.
Prove your optimized audio setup gives you the superior game sense needed to climb leaderboards.
Dominate your gaming circle today!
In Short
- Windows Loudness Equalization gives competitive gamers an advantage by amplifying quiet sounds like footsteps while compressing loud noises, enhancing critical audio cues.
- This audio setting helps overcome dynamic range limitations, prevents ear fatigue, and preserves hearing by making all important sounds audible without extreme volume levels.
- Enabling Loudness Equalization is a straightforward process within Windows sound settings and is considered a vital audio optimization for gaining a competitive edge in gaming.
Optimizing the ‘Release Time’ to Hear Footsteps After Gunshots
Mastering Release Time for Unrivaled Auditory Awareness
In competitive gaming, every sound cue matters. Windows Loudness Equalization helps balance audio.
However, its “Release Time” setting can be a hidden weapon, or a major handicap.
This critical setting dictates how quickly the volume normalization returns to normal after a loud sound.
It affects recovery time after events like a devastating grenade or an intense firefight.
What is Release Time and Why Does it Matter?
Think of Release Time as the recovery speed of your audio. When a loud explosion hits, Loudness Equalization momentarily reduces the overall volume.
The Release Time determines how long that reduced volume persists before returning to normal levels.
A longer release means quiet sounds, like enemy footsteps, stay suppressed for too long.
This delay can cost you crucial information and milliseconds, allowing opponents to sneak up unnoticed.
Optimizing Release Time to Hear Footsteps After Gunshots
Your goal is to set the Release Time as short as possible without making the audio feel jarring or artificial.
You want those footsteps to “pop” back into audibility instantly after the chaos subsides.
A finely tuned Release Time ensures you regain full auditory awareness moments after a loud event, giving you the edge in clutch situations.
For additional audio optimization, consider exploring dedicated guides on best EQ settings for footsteps to further refine your sound profile.
Step-by-Step Calibration for Maximum Advantage
Dialing in the perfect Release Time requires a bit of experimentation. Follow these steps to get started:
- Access Sound Settings: Right-click the speaker icon in your Windows system tray. Then, select “Sound settings.”
- Open Sound Control Panel: Navigate to the “Sound Control Panel” from the right-hand menu.
- Select Playback Device: Right-click your primary gaming headset or speaker and choose “Properties.”
- Go to Enhancements: Click on the “Enhancements” tab within the device properties window.
- Adjust Loudness Equalization Settings: Ensure “Loudness Equalization” is checked. Click the “Settings” button located next to it.
- Set Release Time: Here you’ll find the slider or dropdown for Release Time. For most competitive games, aim for the shortest possible setting.
After adjusting, apply the changes and jump into your favorite game.
Pay close attention to how quickly footsteps become audible after grenades, gunfire, or character abilities.
Test different short settings to find what feels most natural and responsive for your ears and specific game environment.
A bar chart illustrating the approximate percentage of crucial footsteps detected after a loud sound: Long Release Time (30%), Medium Release Time (65%), and Short Release Time (90%).
This chart demonstrates that a shorter release time drastically improves your ability to pick up on critical audio cues.
Don’t leave this advantage on the table.
Once you’ve optimized your audio, head over to Joltfly’s Reaction Time Test to see how quickly you can respond to newfound auditory information.
Challenge your gaming circle to fine-tune their settings and compare results. Dominate the soundscape and climb those leaderboards!
The Impact of Compression Release Delay on Audio Cues
Understanding Compression Release Delay
Compression release delay is a critical setting in audio processing.
It dictates how quickly the Loudness Equalization effect disengages after the sound level drops below a certain threshold.
Think of it as the recovery time for your audio. A shorter delay means the system returns to normal volume faster.
Conversely, a longer delay holds the amplified volume for a longer duration.
Why Release Delay Matters for Footsteps
In competitive gaming, every millisecond counts. A properly configured release delay can make or break your ability to hear crucial audio cues.
If your release delay is too long, quieter sounds might get masked because the system is still recovering from a loud explosion.
This creates a “muddy” soundscape where quick, transient sounds disappear.
Conversely, a too-short delay can cause pumping or breathing artifacts.
This means the background noise might suddenly jump in volume when a loud sound ends, distracting you from subtle cues.
Fine-Tuning for Maximum Advantage
The sweet spot for release delay is crucial for competitive play.
You want to ensure that quiet sounds, like footsteps, become audible without distorting your overall audio experience.
Most competitive players aim for a balance. You need enough sustain to make quiet sounds clear.
However, avoid settings that delay the system’s reaction to new, equally important sound events.
Testing different settings is key. Jump into a custom game or training map and experiment.
Pay close attention to how quickly footstep sounds fade or become prominent after gunfire or explosions.
Consider how audio processing can impact your overall audio latency.
Even small adjustments to system settings can make a tangible difference in your ability to react.
A bar chart showing the relative effectiveness of different release delay settings for audio cue detection: Too Short (30%), Optimal (90%), and Too Long (50%).
Finding the optimal release delay can dramatically enhance your situational awareness. It helps you pinpoint enemy locations with greater accuracy.
Don’t just set it and forget it. Every game can react differently to these settings, so adjust and refine as needed.
Recommended Release Delay Settings
While specific values can vary, here’s a general guideline for optimizing your compression release delay for competitive gaming:
- Fast Release (Short Delay): Ideal for games where quick, distinct audio cues are paramount. It ensures loud sounds don’t linger and mask immediate quieter events.
- Medium Release (Balanced Delay): A good starting point for most games. It provides clarity without excessive pumping.
- Slow Release (Long Delay): Generally not recommended for competitive gaming as it can obscure critical, rapidly occurring sound information.
Focus on what feels natural and responsive to your ears in high-pressure situations. Practice listening for subtle shifts in the soundscape.
Head over to Joltfly’s Trainer Games section to test your newly optimized audio settings in a controlled environment.
Challenge your friends and see who can react fastest to those crucial footsteps!
Registry Guide: Reducing Release Time for Instant Recovery
Why Release Time Matters for Competitive Audio
In competitive gaming, every audio cue is vital. Hearing subtle footsteps or distant reloads can give you the critical edge needed to dominate your opponents.
Windows Loudness Equalization boosts quiet sounds, making those crucial audio details stand out. But there’s a catch: the “Release Time” setting.
This setting controls how quickly Loudness Equalization returns to its normal state after a loud sound, like an explosion or intense gunfire.
If your Release Time is too long, the equalization effect lingers. This can suppress quieter sounds that occur immediately after a loud event.
Imagine missing enemy footsteps because your audio system is still recovering from a grenade blast. That’s a game-losing scenario you need to avoid.
Accessing the Registry Editor (Regedit)
Adjusting the Loudness Equalization Release Time requires a dive into the Windows Registry. This is a powerful tool, so proceed with caution.
Incorrect changes can impact system stability. Always back up your registry before making significant edits.
- Press Windows Key + R to open the Run dialog.
- Type regedit and press Enter.
- Grant administrator permissions if prompted.
Navigating to the Audio Endpoint Key
You need to find the specific registry key for your audio device. This is where the Loudness Equalization settings reside.
- In Regedit, navigate to:
HKEY_LOCAL_MACHINE\SOFTWARE\Microsoft\Windows\CurrentVersion\MMDevices\Audio\Render - Expand the Render key. You will see a list of GUIDs (Globally Unique Identifiers).
Identifying Your Audio Device
Each GUID represents an audio playback device connected to your system. Finding the right one can be tricky.
You need to check the “Properties” subkey under each GUID. Look for the “FriendlyName” value to identify your active gaming headset or speakers.
For example, you might see “FriendlyName” as “HyperX Cloud II” or “Realtek Digital Output”. Locate the device you use for gaming.
Once you find your device’s GUID, expand it. Then, navigate to the FxProperties subkey: {YOUR_DEVICE_GUID}\FxProperties
Modifying the Release Time Value
Inside the FxProperties key, you’ll find the specific settings for audio enhancements.
Locate the DWord value named {c2f038f4-41d5-4521-b1e1-1d5752c07f43},0. This controls the Release Time.
- Double-click on the {c2f038f4-41d5-4521-b1e1-1d5752c07f43},0 DWord.
- Ensure “Base” is set to Hexadecimal.
- Modify the “Value data”.
Recommended Values for Gaming
Lower values mean a faster recovery, which is ideal for competitive gaming. An instant recovery ensures you never miss a sound.
Many pro gamers opt for the lowest possible setting to maximize immediate audio feedback. Experiment to find what works best for you.
A bar chart showing Loudness Equalization Release Time values and their approximate effect on audio recovery time in milliseconds. Value 0 provides instant recovery, while F (15) results in a recovery time of approximately 7500ms.
A value of 0 (hexadecimal) provides the quickest recovery. This aggressive setting ensures Loudness Equalization resets almost instantly.
You can also explore specific best EQ settings for footsteps to further refine your audio advantage.
After adjusting, restart your game or even your PC to ensure the changes take effect. Test your audio in-game immediately.
Reducing audio latency is key for competitive play.
For even more ways to sharpen your auditory senses, check out our guide on how to reduce VoiceMeeter audio latency for gaming.
Challenge your friends on Joltfly’s Aim Trainer or Click Speed Test to see who has the fastest reflexes after these tweaks!
In Short
- Release Time in Windows Loudness Equalization determines how quickly audio volume returns to normal after loud sounds.
- Optimizing Release Time to be as short as possible is crucial for competitive gaming to quickly hear subtle cues like enemy footsteps after loud events.
- Adjusting this setting in Windows Sound Control Panel can significantly improve auditory awareness and provide a competitive advantage.
Troubleshooting Missing Enhancements and Realtek Driver Bugs
Why are Your Audio Enhancements Missing?
You’re ready to dominate, but your audio enhancements, especially Loudness Equalization, are nowhere to be found.
This is a common frustration for competitive gamers. Missing enhancements can severely hinder your ability to hear crucial footsteps and enemy movements.
The core problem usually boils down to outdated drivers, generic Windows drivers, or specific software bugs, especially with Realtek audio.
Don’t let subpar audio hold you back from clutch plays. It’s time to troubleshoot like a pro.
Reclaiming Your Sound: Driver Updates and Realtek Fixes
Update Your Audio Drivers for Victory
Outdated or generic audio drivers are the primary culprit behind missing sound enhancements.
Windows often installs basic drivers that lack the full functionality of your hardware’s specific drivers.
For Realtek chipsets, you need the manufacturer’s custom drivers to unlock features like Loudness Equalization.
Always prioritize drivers directly from your motherboard manufacturer’s website or Realtek’s official portal.
A bar chart showing common PC gaming problems. Audio/Sound Issues account for 18% of reported problems, according to Statista (2023).
A global survey by Uswitch. revealed that “audio or sound issues” are experienced by 18% of PC gamers.
This highlights how critical proper audio setup is for a seamless gaming experience.
The Realtek Audio Console Conundrum
Many users report the Realtek Audio Console app either doesn’t appear or functions incorrectly after driver installations.
This often stems from conflicting driver versions or an incomplete installation process.
To fix this, you might need to perform a clean uninstall of all current audio drivers first.
Then, download and install the specific UAD (Universal Audio Driver) package from your motherboard vendor or Realtek’s site.
This ensures compatibility and unlocks the full suite of enhancements.
Essential Checks for Missing Enhancements
When Loudness Equalization or other enhancements disappear, a systematic check can bring them back.
Don’t just reinstall blindly. Verify these settings first to save time and get back into the game faster.
| Issue | Quick Fix |
|---|---|
| No Enhancements Tab | Ensure correct Realtek UAD drivers are installed. Uninstall generic drivers first. |
| Realtek Audio Console Missing | Download and install from Microsoft Store after clean driver installation. |
| Enhancements Greyed Out | Check if “Disable all enhancements” is ticked. Test different audio formats (e.g., 16-bit, 44100 Hz). |
| Generic Drivers Overwriting Realtek | Disable automatic driver updates in Windows settings. |
| Sound Input Lag/Crackling | Verify polling rates of peripherals. Consider optimizing settings. You can learn more about how to fix audio crackling caused by high polling rate mice. |
Reinstalling Audio Drivers the Pro Way
A clean driver installation is your best bet for resolving persistent audio enhancement issues.
First, open Device Manager (Win + X, then select Device Manager).
Expand “Sound, video and game controllers,” right-click your audio device (e.g., Realtek High Definition Audio), and select “Uninstall device.”
Crucially, tick the box that says “Attempt to remove the driver software for this device.”
Reboot your PC, then install the downloaded drivers from your manufacturer’s website or Realtek directly.
Dominate Your Soundscape with Joltfly
Mastering your audio setup gives you a competitive edge. Hearing footsteps early can make all the difference.
Regularly check for driver updates and troubleshoot any missing enhancements immediately.
Once your audio is optimized, challenge your auditory skills with Joltfly’s Device Tests to confirm peak performance.
Push your limits and dominate every match with crystal-clear audio.
In Short
- Missing audio enhancements, like Loudness Equalization, are a common frustration for gamers, often caused by outdated or generic drivers, particularly with Realtek chipsets.
- To resolve these issues, users should prioritize installing specific manufacturer or Realtek UAD drivers after performing a clean uninstallation of existing audio drivers.
- Troubleshooting involves updating drivers, correctly installing the Realtek Audio Console, and systematically checking settings to restore full audio enhancement functionality.
Hear Every Step, Secure the Win
You now possess the secret weapon to hear enemies before they spot you. Loudness Equalization changes the game entirely.
Don’t settle for average audio. Tweak those settings and gain the upper hand. Your K/D ratio is about to skyrocket!
Get out there, test your new hearing, and dominate the server. Victory is just a sound cue away!
Frequently Asked Questions
Does this ruin directional audio?
It boosts quiet sounds by compressing range. Distance perception might feel different at first, but practice makes perfect.
Is using Loudness Equalization cheating?
Absolutely not. This is a standard Windows feature. You are simply optimizing your rig for peak performance. It is 100% legal.
Will gunshots hurt my ears?
Actually, it helps! It balances volume, so gunshots aren’t as deafening compared to footsteps. It creates a consistent audio level.
Do I need an expensive headset?
Nope! This trick works with almost any headset plugged into a Windows PC. You don’t need pro gear to sound like a pro.