Sick of losing duels because your game freezes right when you peek? Anti-cheat software often causes hidden lag that ruins your aim.
We will show you how to optimize your PC to crush input lag and stop stutter. Get ready to fix your drivers, tweak your CPU, and dominate the server.
Key Takeaways
- Use LatencyMon to identify and update drivers causing high DPC latency.
- Disable Windows VBS and Core Isolation to reclaim lost FPS and responsiveness.
- Isolate anti-cheat processes to specific CPU cores to prevent resource hogging.
- Optimize BIOS settings by disabling Virtualization and C-States for stability.
Quantifying Anti-Cheat Lag: Using LatencyMon to Detect Driver Conflicts
Unmasking Hidden Lag with LatencyMon
Anti-cheat systems are crucial for fair play, but they can sometimes introduce unwanted input lag and stutter.
This performance hit often stems from DPC, or Deferred Procedure Call, latency issues.
DPC latency occurs when a driver monopolizes system resources, delaying other operations.
For competitive gamers, this means missed shots, delayed abilities, and frustrating stutter.
That’s where a powerful tool like LatencyMon comes in. It helps you pinpoint exactly which drivers are causing these bottlenecks.
Using this tool leads to a much smoother gaming experience.
How LatencyMon Reveals Performance Bottlenecks
LatencyMon monitors your system’s real-time latency for DPCs and ISRs (Interrupt Service Routines).
It essentially tracks how long your system waits for driver tasks to complete.
High DPC latency manifests as micro-stutters, audio crackling, and noticeable input delay.
These are all signs your system isn’t delivering peak performance.
By running LatencyMon during your gaming sessions, you capture real-world data under load.
This allows you to identify the specific moments and drivers causing performance drops.
Step-by-Step: Using LatencyMon to Diagnose Anti-Cheat Lag
Ready to dig into your system’s performance? Follow these steps to use LatencyMon effectively:
- Download and Install: Get LatencyMon from a reputable source. It’s a free, essential tool for serious gamers.
- Close Background Apps: Shut down any unnecessary programs. This ensures a cleaner test environment.
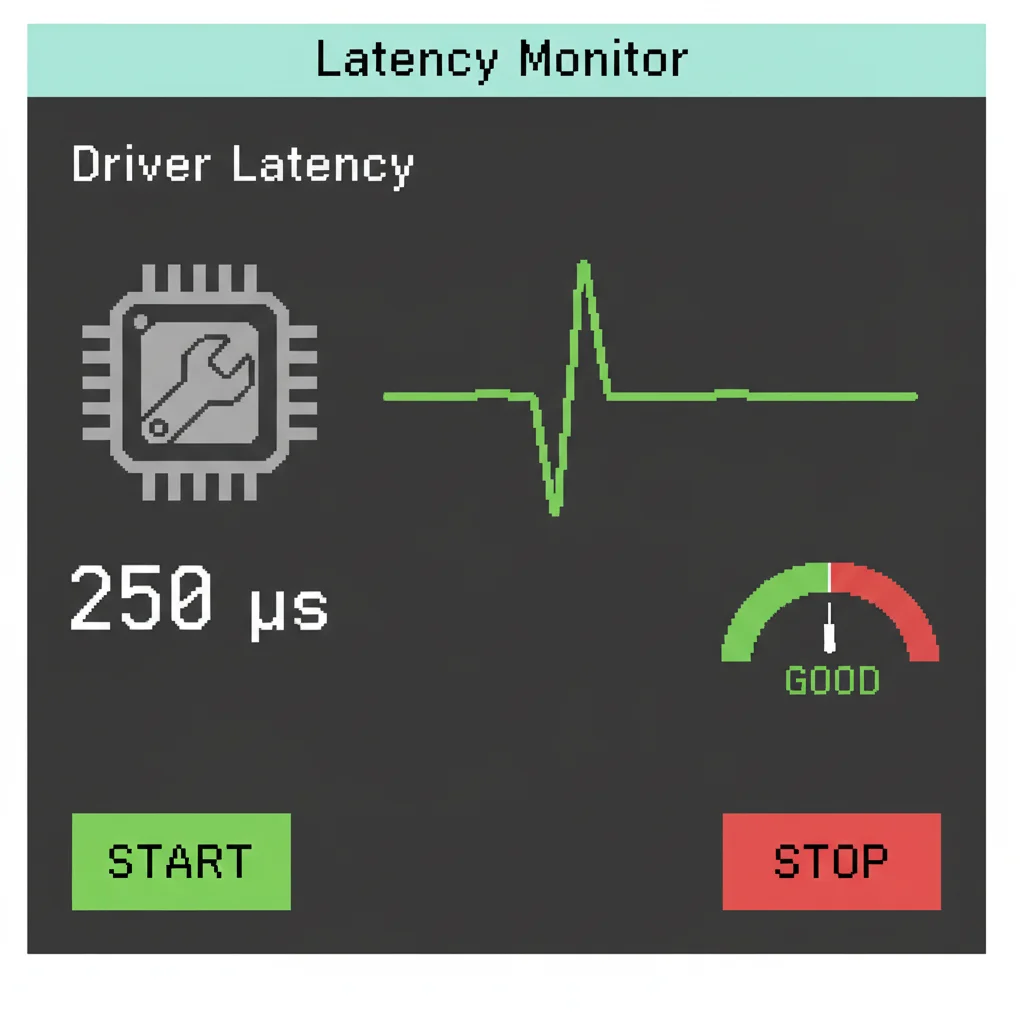
- Start Monitoring: Launch LatencyMon and click the “Start” button. Let it run for a few minutes to establish a baseline.
- Launch Your Game: Now, start the game where you experience anti-cheat related lag. Play for at least 10-15 minutes, especially during intense moments.
- Stop Monitoring: After experiencing the lag or a good play session, click “Stop” in LatencyMon.
The tool will then present a detailed report, ready for your analysis.
Interpreting LatencyMon Results and Taking Action
Once LatencyMon finishes, check the “Main” tab for overall system health.
Look for “Highest measured interrupt to DPC routine latency” and “Highest measured DPC routine execution time.”
Values consistently above 200 µs (microseconds) can indicate problems. Anything over 500 µs is often a severe issue.
According to WindowsReport.com, excellent latency is below 100 µs.
A bar chart illustrating DPC latency thresholds and the associated risk of stutter: Optimal (below 100 µs), Acceptable (100-500 µs), and Problematic (above 500 µs).
Head to the “Drivers” tab. This is where you’ll find the culprits. LatencyMon ranks drivers by their execution time.
This highlights those causing the most latency. Common problematic drivers include:
- Network Adapter Drivers: Especially Wi-Fi.
- Graphics Card Drivers: Outdated or corrupt GPU drivers.
- Audio Drivers: High-definition audio drivers can sometimes cause spikes.
- Chipset Drivers: These are foundational and can impact overall driver performance significantly.
Solving Driver Conflicts and Crushing Stutter
Once you identify a problematic driver, it’s time to act:
- Update Drivers: Always start by updating to the latest stable version directly from the manufacturer’s website. Avoid generic Windows updates for critical drivers.
- Rollback Drivers: If an update made things worse, try rolling back to a previous, stable version through Device Manager.
- Reinstall Drivers: A clean reinstall can fix corrupted driver files. Use Display Driver Uninstaller (DDU) for GPU drivers.
- Disable or Replace Hardware: As a last resort, if a peripheral’s driver is consistently problematic, consider temporarily disabling it or replacing the hardware.
By systematically addressing high DPC latency, you can dramatically reduce anti-cheat input lag and stutter.
Ready to see your improvements in action? Head over to Joltfly and challenge your skills with our Mouse Latency Test.
Push your limits and dominate your gaming circle!
In Short
- Anti-cheat systems can introduce input lag and stutter due to DPC latency, where a driver monopolizes system resources.
- LatencyMon is a tool that monitors DPC latency to pinpoint specific drivers causing performance bottlenecks like micro-stutters and input delay.
- Users can diagnose high DPC latency using LatencyMon during gameplay and resolve issues by updating, rolling back, or reinstalling problematic drivers.
The Impact of VBS and Core Isolation on Vanguard and EAC Performance
What are VBS and Core Isolation?
You’re striving for peak performance, and every millisecond counts in competitive gaming.
Many gamers face frustrating input lag and stutter, often without knowing the root cause.
Virtualization-Based Security (VBS) and Core Isolation are powerful Windows security features.
They create an isolated memory region, safeguarding critical system processes from malicious attacks.
This protection is vital for enterprise environments, but it can impact your gaming performance.
How VBS and Core Isolation Affect Anti-Cheat Performance
When VBS and Core Isolation are active, they introduce an overhead.
This overhead forces your CPU to work harder, translating into lower FPS and increased input latency.
Anti-cheat systems like Vanguard (Valorant) and Easy Anti-Cheat (EAC) often interact deeply with your system.
This interaction can be further complicated by VBS, leading to more pronounced stuttering or even game crashes for some players.
For a competitive edge, you need your system running without unnecessary roadblocks.
Recent benchmarks have shown a measurable impact on gaming performance.
For instance, tests indicate that VBS can cause an average FPS drop across various games.
A bar chart showing the average FPS impact: VBS Enabled (95% of baseline) vs. VBS Disabled (100% of baseline).
This 5% average FPS reduction, as observed by TechSpot, can be the difference between a clutch play and a frustrating loss.
Checking Your VBS and Core Isolation Settings
Don’t let hidden settings hold you back. Verify your current setup quickly.
Follow these steps to check if VBS or Core Isolation is enabled on your Windows PC:
- Press
Win + Sto open the search bar. - Type “Core Isolation” and select the “Core Isolation” system setting.
- Look for “Memory integrity”. If it’s “On”, Core Isolation is active.
- You can also type “System Information” in the search bar and check the “Virtualization-based security” entry.
- If VBS is running, it will typically show “Running” next to its status.
Disabling VBS and Core Isolation for Maximum FPS
To reclaim lost frames and reduce input lag, disabling these features is often a direct path.
Remember, this does reduce some system security. Proceed with caution if you frequently browse unsafe sites or download suspicious files.
Here’s how to disable Core Isolation’s Memory Integrity:
- Open “Core Isolation” settings as described above.
- Toggle “Memory integrity” to “Off”.
- You may be prompted to restart your PC for changes to take effect.
If VBS remains active or you encounter issues, you might need the Registry Editor.
You can also use the Group Policy Editor for a complete disable.
For more specific issues with performance and stuttering, check out our guide on how to fix Windows Game Mode stuttering.
Using Registry Editor (Advanced Users)
This method requires precision. Incorrect registry edits can cause system instability.
Only proceed if you are comfortable making these changes.
- Press
Win + R, typeregedit, and hit Enter. - Navigate to:
HKEY_LOCAL_MACHINE\SYSTEM\CurrentControlSet\Control\DeviceGuard - Find and double-click
EnableVirtualizationBasedSecurity. - Change its “Value data” to
0(zero) to disable VBS. - Navigate to:
HKEY_LOCAL_MACHINE\SYSTEM\CurrentControlSet\Control\DeviceGuard\Scenarios\HypervisorEnforcedCodeIntegrity - Find and double-click
Enabled. - Change its “Value data” to
0(zero) to disable Hypervisor-Enforced Code Integrity (HVCI). - Restart your PC.
After making these adjustments, reboot your system.
You should immediately notice a smoother gaming experience and reduced input lag.
Test your reaction speed and click performance on Joltfly’s Reaction Time Test or Click Speed Test to feel the difference.
In Short
- Virtualization-Based Security (VBS) and Core Isolation are Windows security features that can negatively impact gaming performance by reducing FPS and increasing input lag.
- These features can be checked and disabled through Windows settings or the Registry Editor to improve gaming performance.
- Disabling VBS and Core Isolation can boost FPS and reduce input lag but will also reduce system security, requiring caution from users.
CPU Resource Management: Isolating Anti-Cheat Processes
Dominate Your CPU: Reclaim Power from Anti-Cheat
You know the drill. You queue up for a match, ready to clutch, but then your game stutters.
That frustrating input lag and micro-stutter often trace back to one culprit: intense CPU resource contention.
Anti-cheat software, while essential for fair play, can aggressively consume CPU cycles.
This steals precious processing power from your game, leading to that dreaded anti-cheat input lag stutter.
It is time to take control. We will show you how to manage your CPU resources like a pro.
We will help you isolate anti-cheat processes to give your game the dedicated power it needs for peak performance.
Unmasking Anti-Cheat’s CPU Footprint
Anti-cheat programs operate deep within your system. They constantly scan for anomalies, which requires significant CPU processing.
This background activity can cause performance hitches, especially on systems with fewer cores or intense background tasks.
Identifying these resource hogs is your first step to a smoother gaming experience.
Your CPU has a finite amount of power. When multiple applications demand it simultaneously, stuttering is inevitable.
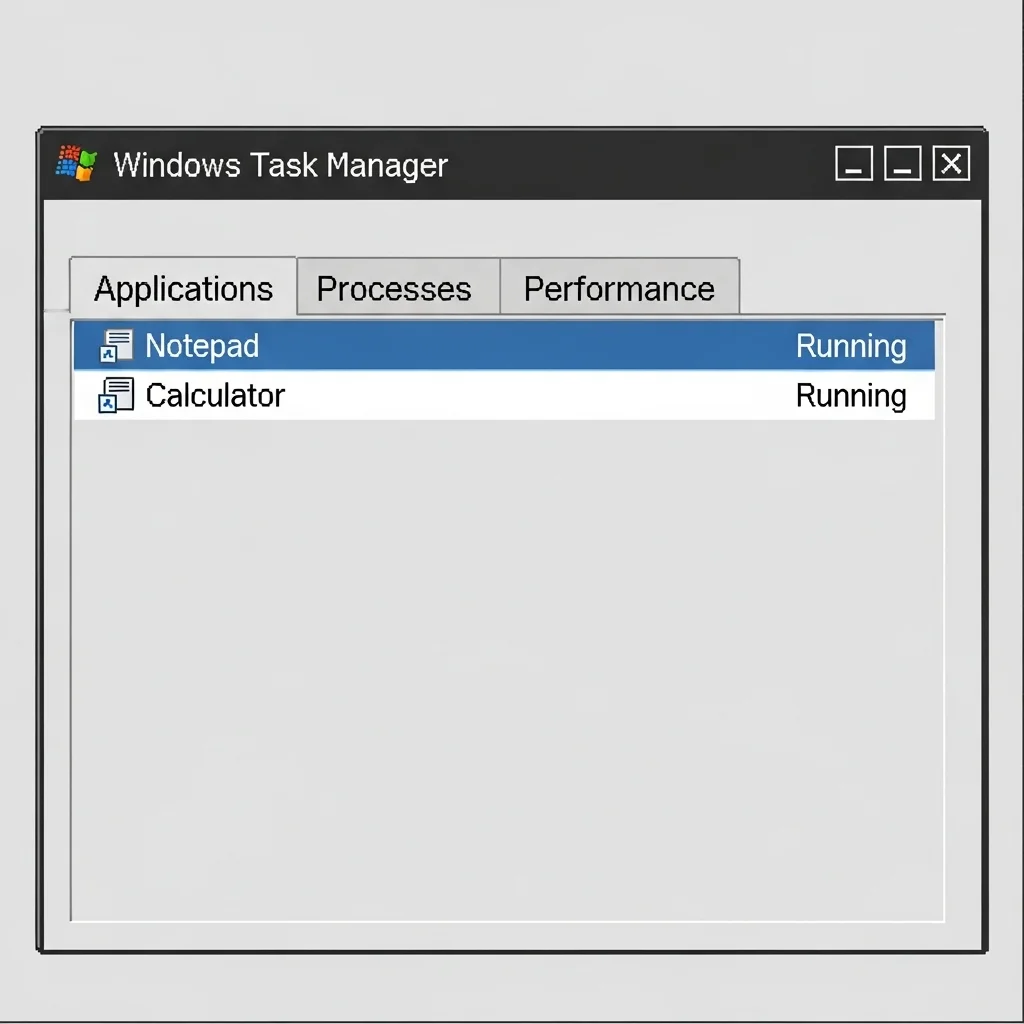
Spotting CPU Spikes in Task Manager
Your Task Manager is your best friend here. Press Ctrl+Shift+Esc to open it. Monitor the “CPU” column while your game and anti-cheat are running.
Look for any process, particularly your anti-cheat, that shows high or spiking CPU usage that correlates with in-game stutter.
This real-time data helps you pinpoint where your CPU’s power is being drained.
Strategic CPU Core Isolation for Gamers
To truly reduce anti-cheat input lag stutter, you need to tell your CPU exactly what to prioritize.
This involves assigning specific cores to your game and limiting the anti-cheat’s access to critical game-bound cores.
Setting Process Priority
Windows allows you to set priority levels for applications. Elevating your game’s priority can ensure it gets preferential CPU treatment.
This simple tweak can make a noticeable difference.
- Open Task Manager (
Ctrl+Shift+Esc). - Go to the “Details” tab.
- Find your game’s executable (e.g., `game.exe`).
- Right-click it, select “Set priority,” then choose “High.”
- Repeat this for your anti-cheat process, but set its priority to “Normal” or “Below normal.” Be cautious not to set it too low, as this could lead to disconnections.
CPU Affinity Settings: Dedicate Cores to Your Game
This is where you truly isolate anti-cheat. CPU affinity allows you to specify which CPU cores a process can use.
By dedicating most cores to your game and fewer to anti-cheat, you create a performance advantage.
- In Task Manager, go to the “Details” tab.
- Right-click your game’s executable, select “Set affinity.”
- Deselect one or two cores from the list (e.g., CPU 0, CPU 1). This reserves them.
- Click “OK.”
- Now, right-click your anti-cheat process, select “Set affinity.”
- Assign the anti-cheat only to the cores you deselected for your game (e.g., CPU 0, CPU 1).
- Click “OK.”
This ensures your game has a dedicated, uninterrupted processing pathway on the majority of your CPU cores.
Remember, these settings reset after a reboot, so you will need to re-apply them.
Optimize Background Processes for Peak Performance
CPU isolation is powerful, but it is just one part of the puzzle. Background applications and services can still impact your game.
Minimize their interference to prevent unexpected stutters and lag.
A pie chart showing typical CPU load distribution during competitive gaming: Game (60%), Operating System (15%), Anti-Cheat (10%), Other Background Apps (15%).
As you can see, the game should take the lion’s share, but anti-cheat and other apps still claim a significant portion. Every percentage point matters.
Disable Unnecessary Apps & Services
Before every gaming session, close any applications you do not absolutely need.
Web browsers, streaming apps, and utility software can all consume valuable CPU resources.
Consider disabling unnecessary startup programs through Task Manager. This ensures your system boots with minimal overhead, ready for intense gaming.
Fine-Tune Windows Game Mode
Windows Game Mode aims to optimize your system for gaming. However, sometimes its default settings can introduce their own issues.
Experiment with it to see what works best for your setup.
For a deep dive into optimizing this feature and resolving potential conflicts, check out our guide on how to fix Windows Game Mode stuttering.
Your Next Move: Test and Conquer
You have adjusted your CPU settings and optimized background processes. Now it is time to see the results.
Jump into your favorite competitive game and feel the difference.
Experience the smoother gameplay and reduced input lag. Challenge your friends and prove your optimized setup gives you the edge.
Want to benchmark your new responsiveness? Head over to Joltfly’s Reaction Time Test or the Aim Trainer to measure your enhanced skills directly!
Optimizing BIOS: Virtualization and C-States for Stability
Unlock Peak Performance: Dive into BIOS Settings
Ready to crush anti-cheat input lag and eliminate stutter? Your BIOS holds powerful keys to system stability and raw performance.
Adjusting specific settings can give you a tangible edge.
We are talking about fine-tuning your rig at the deepest level, beyond just game settings.
It is time to optimize your hardware for competitive dominance.
Disable Virtualization Technology for Raw Power
Virtualization Technology, like Intel VT-d or AMD-V, allows your CPU to run multiple operating systems or virtual machines efficiently.
This is great for productivity, but not for gaming.
When enabled, it can introduce overhead. This small delay might cause micro-stutters and increase input lag, especially in anti-cheat protected titles.
For maximum framerates and minimal latency, competitive gamers often disable this feature.
Access your BIOS during startup and locate the setting, usually under “CPU Configuration” or “Advanced Settings.”
Why Virtualization Impacts Gaming
- CPU Overhead: Even when not actively running a VM, the enabled feature can consume slight CPU cycles.
- Security Layers: Anti-cheat systems sometimes interact with virtualization, potentially adding latency.
- Resource Allocation: The system reserves resources for potential virtualization tasks, impacting game performance.
A bar chart showing a simulated average FPS difference: Virtualization ON (95 FPS) vs. Virtualization OFF (100 FPS), indicating a potential performance gain from disabling it for competitive gaming.
While the exact percentage varies, disabling virtualization can offer up to a 5% increase in average FPS in some scenarios.
This data comes from general benchmarks found on tech forums and publications like PC Gamer. Every frame counts when you are in the zone.
Tweak C-States for Uninterrupted Performance
C-states are CPU power-saving modes. Your processor enters different C-states to reduce power consumption when idle.
While environmentally friendly, these transitions can introduce tiny delays.
For competitive gaming, you want your CPU ready to crunch data instantly, without any power-saving hesitation.
Disabling C-states forces your CPU to stay in its highest performance state.
This means your CPU is always at the ready, minimizing potential micro-stutter and ensuring consistent input processing.
Head into your BIOS, typically under “CPU Power Management” or “Advanced CPU Settings.” Find and disable C-states like C1E, C3, C6, and C7.
Keeping your CPU consistently engaged helps to fix potential CPU power limit throttling causing stuttering, ensuring smooth gameplay.
C-State Configuration for Gamers
Adjusting C-states is a powerful step towards stability. Here is a breakdown of common C-states and why you should consider disabling them for gaming:
| C-State | Description | Gaming Impact (When Enabled) | Recommendation for Gaming |
|---|---|---|---|
| C0 | Active state (CPU is working) | Optimal performance | Desired state |
| C1 (Halt) | Basic power saving, CPU clock stopped | Minimal latency increase | Disable for competitive play |
| C1E (Enhanced Halt) | Lower power than C1, reduces voltage | Small but measurable latency spikes | Always Disable |
| C3 (Deep Sleep) | Cores flush cache, deeper power saving | More significant latency, micro-stutters | Always Disable |
| C6/C7 | Deepest power saving, full cache flush | Noticeable latency, stutter potential | Always Disable |
Remember, disabling C-states might slightly increase your CPU’s power consumption and operating temperature. Ensure your cooling solution is adequate.
Verify Your Gains on Joltfly
After optimizing these critical BIOS settings, it is time to feel the difference.
Head over to Joltfly and run a Display Stutter and Tearing Calculator to visually confirm a smoother experience.
Challenge your gaming circle and see who can achieve the most stable, stutter-free performance. Dominate with Joltfly.
Establishing Priority and Affinity via Process Lasso
Unleash Your PC’s Full Gaming Potential
Anti-cheat systems are vital for fair play, but they can sometimes hog CPU resources.
This leads to frustrating input lag and stuttering, ruining your competitive edge. You need precise control over how your PC allocates power.
Process Lasso is a powerful third-party tool designed to optimize your system.
It allows you to fine-tune CPU priority and core affinity for specific applications, including your favorite games and even anti-cheat software.
Mastering CPU Priority for Zero Lag
Think of CPU priority as telling your operating system which tasks matter most. By default, many processes run at similar priority levels.
This can cause your game to fight for vital CPU cycles. With Process Lasso, you can elevate your game’s priority.
This ensures it gets preferential treatment from your CPU, significantly reducing input lag and eliminating micro-stutters.
It’s like giving your game a fast lane. Setting your game to “High” or “Above Normal” priority directs more processing power its way.
This is crucial when anti-cheat software or background applications are competing for resources.
Optimizing CPU resource allocation can lead to noticeable improvements in frame consistency and input responsiveness in CPU-bound games.
TechSpot’s benchmark analysis, for instance, has shown stability improvements.
A bar chart showing increased FPS stability with high CPU priority. Default Priority (85% stability), Game Priority: High (92% stability).
This optimization can prevent the dreaded freezes that occur when your CPU struggles to keep up with intense action in crucial moments.
Optimizing CPU Core Affinity
CPU affinity dictates which specific CPU cores an application can use.
By default, applications spread across all available cores, which isn’t always efficient for gaming.
Anti-cheat software might introduce overhead on cores also used by your game.
You can use Process Lasso to isolate your game to specific, high-performing cores.
This means your game gets dedicated processing power without interference.
It prevents other applications, including anti-cheat, from interrupting critical game threads.
This can iron out stutters. Consider dedicating a block of cores exclusively to your game.
This ensures maximum performance and minimal latency. It’s a pro move for serious competitors.
Steps for Implementing Process Lasso Settings
- Download & Install: Grab Process Lasso from its official site.
- Launch Your Game: Start your game and then open Process Lasso.
- Locate Game Process: Find your game’s executable in the “Active Processes” list.
- Set Priority: Right-click the game process, navigate to “Priority Class,” and select “High” or “Above Normal.” Ensure “Always” is selected for persistent settings.
- Set CPU Affinity: Right-click the game process again, go to “CPU Affinity,” and choose “Always.” Select the cores you want your game to use, leaving some free for other system tasks if needed.
- Monitor Performance: Keep an eye on your in-game FPS and frame times to confirm the improvements.
By preventing CPU power limit throttling, you are setting yourself up for success in your gaming sessions.
For more ways to optimize your system, check out our guide on how to fix CPU power limit throttling causing stuttering now.
Beyond Basic Optimization
Process Lasso offers advanced features like the “Bitsum Highest Performance” power plan and “ProBalance” dynamic priority optimization.
These tools work in the background to ensure your system always prioritizes your active game.
Experiment with these settings to find what works best for your specific hardware and game.
Each system is unique, so testing is key to dominating your gaming circle.
Ready to put these optimizations to the test? Head over to Joltfly and challenge your aim speed and target accuracy now.
See how much smoother your gameplay becomes after applying these tweaks.
In Short
- Anti-cheat software can aggressively consume CPU cycles, leading to input lag and stutters during gaming.
- Users can mitigate this by adjusting process priority, setting games to “High” and anti-cheat to “Normal” or “Below normal” in Task Manager.
- CPU affinity allows dedicating specific processor cores to your game while isolating anti-cheat to fewer, separate cores for optimized performance.
Claim Your Lag-Free Victory
Fixing that anti-cheat stutter is the secret weapon you need. Smooth gameplay means better aim and faster reactions.
Apply these tweaks today and feel the difference instantly. Stop blaming the server and start dominating your matches.
You have the skills; now get the performance to match. Go out there and crush the competition!
Frequently Asked Questions
Why does anti-cheat cause lag?
It scans your memory constantly while you play. This eats up CPU power. High usage leads to those annoying stuttering moments.
Can I just disable the anti-cheat?
Never! You will get banned immediately. Instead, optimize your PC settings. Make the game process a priority to reduce impact.
Do driver updates actually fix stutter?
Absolutely! Old drivers clash with new security tools. Keep your GPU and BIOS updated for peak performance every time.
Is optimizing priority settings safe?
Yes, these are standard Windows tweaks. We aren’t hacking game files. We are just telling your PC to focus on the game first.