Ready to stop missing shots and start dominating your gaming circle? Optimizing your controller thumbstick tension is the secret weapon you need.
This guide breaks down everything from grams of force to advanced internal mods. Get ready to enhance your skills and dial in that perfect aim on Joltfly.
Key Takeaways
- Understand how grams of force (gF) impact your sensitivity and aiming precision.
- Explore tiered mods ranging from simple tension rings to advanced internal soldering.
- Learn to calibrate your controller to fix centering issues and stick drift.
- Test your new tension setup on Joltfly to visualize your accuracy gains.
Understanding Thumbstick Tension: Grams of Force vs. Sensitivity
Dominate your game with optimized controller input. Understanding thumbstick tension is crucial for competitive players. This isn’t just a comfort setting, it’s a performance enhancer.
Proper tension can be the difference between a headshot and a near miss.
Grams of Force: The Measure of Control
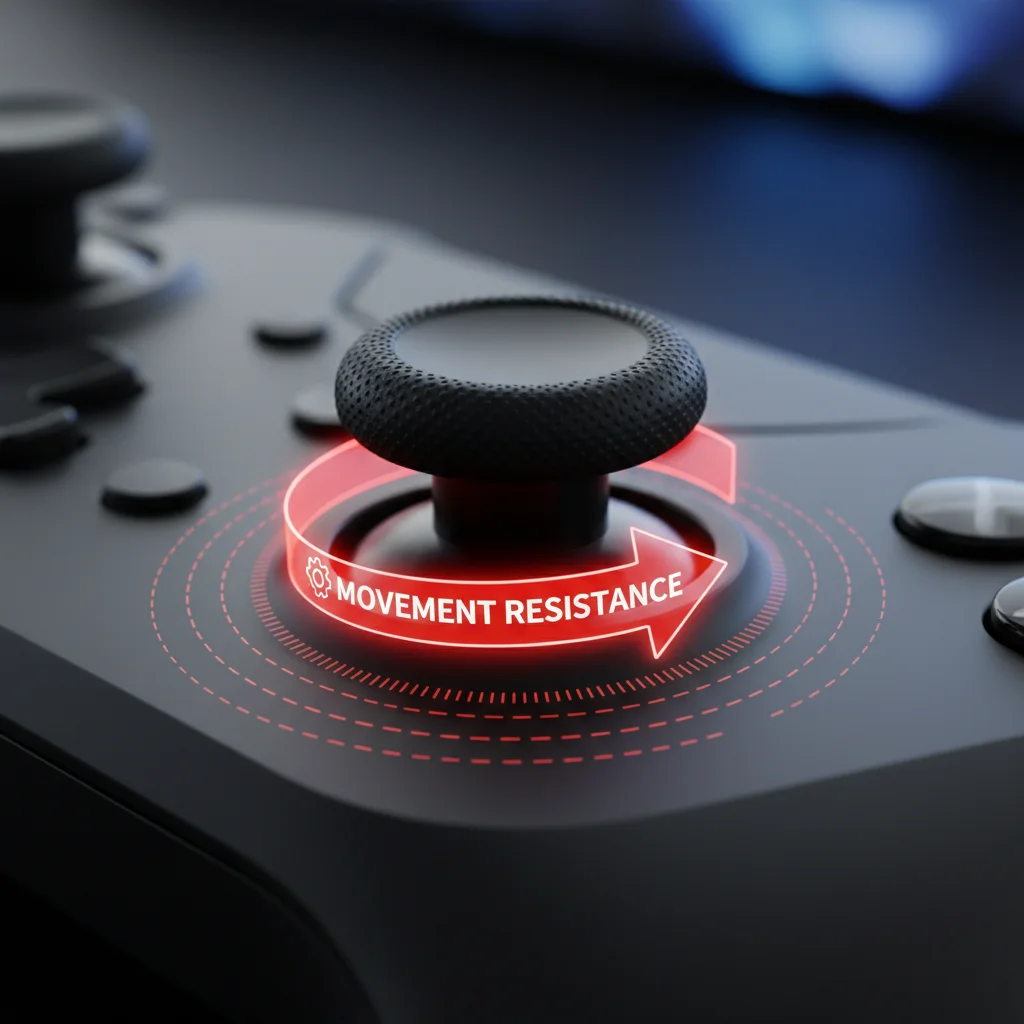
Thumbstick tension refers to the resistance you feel when moving your controller’s analog stick. It’s often measured in “grams of force” (gF).
A higher gF means more resistance. This requires more effort to move the stick.
Conversely, a lower gF provides less resistance. This allows for quicker, lighter movements.
How Tension Impacts Your In-Game Sensitivity
The physical tension of your thumbstick directly affects how you perceive and manage in-game sensitivity settings. It creates a critical feedback loop.
Higher tension allows for finer micro-adjustments. You get more granular control over small movements, which is vital for precise aiming.
This increased resistance helps prevent overshooting targets, especially with high in-game sensitivities. It acts like a built-in dampener.
Lower tension means less physical feedback. Your inputs might feel twitchier, making small adjustments harder without extreme in-game sensitivity drops. Consider how this impacts your controller response curve settings.
A line chart showing projected global esports viewership in millions: 2020 (495M), 2021 (527M), 2022 (574M), 2023 (610M), 2024 (630M), 2025 (640M).
The competitive gaming scene is exploding. For example, global esports viewership is projected to reach 640 million by 2025, according to Statista. This massive audience means fierce competition, making every hardware advantage count.
Finding Your Optimal Tension Sweet Spot
Your ideal thumbstick tension depends on your game, playstyle, and personal preference. There’s no one-size-fits-all answer.
Experimentation is key. Many pro players opt for higher tension to maximize precision in FPS games like Valorant or Call of Duty.
Benefits of Higher Tension:
- Enhanced Precision: Easier to make tiny, accurate aiming adjustments.
- Reduced Overshooting: Less likely to flick past your target.
- Better Control: Improved ability to track moving targets smoothly.
- Fatigue Management: Can sometimes reduce thumb fatigue by requiring less muscle stabilization for small movements.
Benefits of Lower Tension:
- Faster Initial Input: Quicker to initiate movement or turn.
- Less Strain for Rapid Movements: Ideal for games requiring constant, large stick inputs.
- Quick Reflexes: Can feel more responsive for sudden directional changes.
Consider your primary game genre. A high-DPI mouse user might prefer lower mouse sensitivity. Similarly, a controller player can tailor their thumbstick tension.
Test different tensions with Joltfly’s Aim Trainer. Practice tracking and flick shots to see how various tensions feel.
Challenge your gaming circle. See who can achieve the best accuracy with their optimized tension setup on Joltfly.
In Short
- Thumbstick tension, measured in grams of force (gF), significantly affects controller precision and in-game sensitivity perception.
- Higher tension enhances precision for micro-adjustments and prevents overshooting, while lower tension allows for quicker, lighter movements.
- Finding optimal thumbstick tension requires experimentation based on game genre, playstyle, and personal preference.
Tiered Installation Guide: From External Aids to Internal Mods
Ready to dial in your controller for peak performance? Modding your thumbstick tension is a game-changer. This tiered guide takes you from simple external aids to advanced internal modifications.
You’ll gain precision, dominate your gaming circle, and master your aim. Let’s get started on customizing your setup for victory!
Level 1: External Aids for Quick Gains
Start with the easiest, non-invasive options. These mods don’t require opening your controller. They indirectly affect the feel and responsiveness of your thumbsticks.
Thumbstick Extenders
These snap onto your existing thumbsticks. They increase the stick’s height, giving you more leverage. This longer throw effectively reduces the perceived tension, allowing for finer movements.
It’s an instant upgrade for precision aiming without any complex steps.
Tension Rings
Silicone or foam rings fit around the base of your thumbsticks. They add a slight, consistent friction against the stick module housing. This boosts resistance at all points of movement.
Tension rings are affordable and super easy to install. They offer a subtle but noticeable increase in control. They wear out over time, so keep spares ready.
Level 2: Intermediate External Hardware
Some external modifications provide more substantial changes. These might involve replacing the entire thumbstick cap or adding components that interact with the controller’s body.
Performance Thumbsticks
Brands like KontrolFreek offer specialized thumbsticks. These often have different heights, concave or convex tops, and textured grips. While not directly altering internal tension, their design enhances grip and leverage.
This improves control and can feel like an increase in precision. Many competitive players swear by specific thumbstick designs.
Level 3: Internal Modding for Ultimate Control
This is where you truly customize your controller’s feel. Internal mods require opening your controller and replacing components. Be prepared with the right tools and a steady hand.
Before diving deep, understand how different joystick types operate. For insights on durability and performance, check out our guide on Hall Effect Joystick vs Potentiometer.
Replacement Springs
The most common internal mod involves swapping the default springs in your thumbstick modules. Manufacturers offer springs with various tension ratings.
Higher tension springs make the stick feel stiffer. This can help with micro-adjustments and reduce accidental over-aiming. Lower tension springs offer a lighter, faster feel.
Adjustable Tension Modules
Some aftermarket modules allow you to manually adjust the tension. These often use magnetic resistance or adjustable spring mechanisms. They provide the ultimate customization.
This mod offers unparalleled precision, letting you fine-tune sensitivity to your exact preference. It’s an investment, but worth it for serious competitors.
Here’s a breakdown of common thumbstick tension modification types:
| Mod Type | Difficulty | Tension Adjustment Method | Benefits | Considerations |
|---|---|---|---|---|
| Thumbstick Extenders | Easy | Indirect (leverage) | Increased precision, reversible | Changes ergonomics, learning curve |
| Tension Rings | Easy | Direct (friction) | Cost-effective, instant resistance | Limited tension range, wear out |
| Replacement Springs | Medium | Direct (spring force) | Significant, customizable feel | Requires controller disassembly, irreversible per spring |
| Adjustable Modules | Hard | Direct (mechanical/magnetic) | Ultimate precision, variable on-the-fly | Expensive, complex installation, potential voided warranty |
After installing your mods, it’s crucial to fine-tune your in-game settings. Pairing physical tension adjustments with optimized software curves makes a huge difference. Learn more about optimizing your settings with our guide on Linear vs Exponential: Best Controller Response Curve Settings.
Test Your New Setup on Joltfly
Once you’ve made your modifications, put them to the test! Visit Joltfly’s Aim Trainer to see how your new tension affects your accuracy. Challenge your friends to beat your scores and show off your refined controller skills!
Beginner & Intermediate: Precision Rings and Spring Replacement
Ready to level up your controller game?
Precision is key in competitive titles, and customizing your thumbsticks offers a huge edge.
For beginner and intermediate players, two excellent starting points are precision rings and spring replacements.
Master Your Aim with Precision Rings
Precision rings are a simple, yet effective, mod.
These small, foam or silicone rings fit around the base of your thumbsticks.
They act as a physical dampener, limiting the full range of motion.
Benefits of Precision Rings
- Enhanced Control: Reduces over-aiming in crucial moments.
- Smoother Movements: Provides a subtle resistance, making micro-adjustments easier.
- Reduced Sensitivity: Helps you feel more connected to your in-game movements.
This translates directly to more accurate shots and controlled movement.
Installing them is incredibly quick and requires no controller disassembly.
It’s an ideal first step to test the waters of thumbstick tension modification.
Many pro players use them to gain a consistent feel.
Upgrade Your Feel with Thumbstick Spring Replacement
Looking for a more significant tension boost?
Replacing the internal springs in your thumbsticks is the next logical step.
This mod involves opening your controller and swapping out the stock springs with stiffer ones.
The result is a consistently firmer thumbstick feel throughout its entire range of motion.
Why Replace Springs?
- Greater Resistance: Improves fine motor control and reduces accidental inputs.
- Consistent Feedback: Delivers a uniform tension, perfect for flick shots and precise tracking.
- Longevity: High-quality aftermarket springs can sometimes outlast stock components.
This mod provides a tangible difference, helping you make more deliberate movements.
It’s a fantastic upgrade for competitive FPS and racing game enthusiasts.
Consider this if you’re serious about gaining a mechanical advantage.
While more involved than rings, the process is manageable with a guide.
Many guides, like those for Hall Effect joysticks, cover similar disassembly steps.
Precision Rings vs. Spring Replacement: Which is for You?
Choosing between these mods depends on your goals and comfort level.
Precision rings are low-cost, non-invasive, and offer immediate benefits.
They are perfect for a quick improvement without major commitment.
Spring replacements offer a deeper, more profound change in tension.
This is for gamers who want a permanent, consistent, and significantly stiffer feel.
It requires a bit more technical comfort for installation.
Here’s a quick comparison:
| Feature | Precision Rings | Spring Replacement |
|---|---|---|
| Installation Difficulty | Easy (No disassembly) | Moderate (Controller disassembly) |
| Cost | Low | Moderate |
| Tension Increase | Subtle, external dampening | Significant, internal resistance |
| Reversibility | Highly reversible | Reversible with effort |
| Primary Benefit | Reduced over-aiming, micro-adjustments | Enhanced control, consistent feel |
Both methods aim to give you superior control and responsiveness.
Even small improvements to your controller’s input feel can boost your in-game performance.
Level Up Your Controller Skills Now
Don’t let sloppy stick movements hold you back.
These tension mods give you a direct pathway to dominating your gaming circle.
Start with precision rings for an immediate impact.
Then, if you crave more, dive into spring replacements for ultimate control.
Test your newfound precision on Joltfly’s Trainer Games and crush the competition!
Advanced: Desoldering High-Tension Modules (PS5 & Xbox)
You’re ready for the ultimate controller upgrade. Desoldering high-tension modules takes skill.
But mastering this modification gives you an undeniable edge in competitive play. Get ready to dominate.
Why Undertake This Advanced Mod?
Stock thumbstick modules often feel loose. This can cost you crucial micro-adjustments in intense moments.
High-tension modules offer superior feedback. They allow for finer aim control and more precise movement.
This translates directly into enhanced accuracy. You’ll hit those difficult shots consistently.
Essential Tools for Precision
This isn’t a job for basic tools. You need the right gear to succeed.
Gather these items before you begin:
- Precision Soldering Iron: A fine tip is crucial for tiny solder pads.
- Desoldering Pump or Braid: Essential for cleanly removing old solder.
- Quality Solder & Flux: Choose electronics-grade, low-melt solder and a flux pen.
- High-Tension Replacement Modules: Source these specifically for your PS5 or Xbox controller.
- Controller Disassembly Tools: Small Phillips screwdrivers and plastic pry tools.
- ESD-Safe Mat: Protect your controller’s sensitive electronics from static.
- Safety Gear: Always use safety goggles and work in a well-ventilated area.
The Desoldering Workflow: Step-by-Step
Follow these steps carefully to remove your existing modules safely.
- Disassembly: Carefully open your PS5 DualSense or Xbox controller. Disconnect the battery.
- Locate Modules: Identify the current thumbstick modules on the main PCB.
- Apply Flux: Dab a tiny amount of flux onto each solder joint of the module. This helps solder flow.
- Heat & Remove Solder: Heat one pin’s solder joint with your iron. As it melts, quickly use your desoldering pump to clear the solder. Repeat for every pin.
- Gentle Removal: Once all pins are free, gently rock the old module. Lift it straight up from the PCB. Be patient and avoid force to protect the traces.
Installing Your Game-Changing Modules
Now, it’s time to integrate your new high-tension modules.
- Position New Module: Align the replacement module with the clean pads on the PCB. Ensure it sits perfectly flat.
- Solder Each Pin: Apply a small amount of fresh solder to each pin. Heat the pin and pad together, then feed the solder.
- Create Strong Joints: Aim for shiny, cone-shaped solder joints. This indicates a solid connection.
- Thorough Inspection: Use a magnifying glass to check every joint. Look for any unintended solder bridges or dull, weak connections (cold joints).
- Reassemble Carefully: Put your controller back together, ensuring all cables and components are properly connected.
Calibrate & Dominate: Post-Mod Testing
Your modded controller is almost ready for action. But first, test its new power.
Power up your controller and perform initial checks. Test full stick movement and all button inputs.
Then, head to Joltfly. Utilize our Device Tests to confirm optimal performance.
You can also fine-tune other crucial settings to eliminate any trace of controller input lag.
Focus on your aim consistency. Experience the enhanced precision the high-tension modules provide.
With your perfectly modded controller, you’re set to climb the ranks. Master your skills on Joltfly’s Trainer Games and challenge your friends. Show them what true control feels like!
In Short
- Modding controller thumbstick tension is a tiered process, ranging from simple external aids to advanced internal modifications, all aimed at enhancing precision and control.
- External aids like extenders, tension rings, and performance thumbsticks offer quick, non-invasive ways to indirectly adjust stick feel and grip.
- For ultimate customization, internal mods such as replacement springs or adjustable tension modules directly alter stick tension but require opening the controller and careful installation.
Troubleshooting: Calibrating Centering and Fixing Stick Drift
After modifying your controller’s thumbstick tension, you might encounter issues. Improper centering or pesky stick drift can sabotage your gameplay.
Don’t let these minor setbacks cost you crucial wins. We’ll guide you through precise calibration and effective troubleshooting. You’ll restore your controller to peak performance.
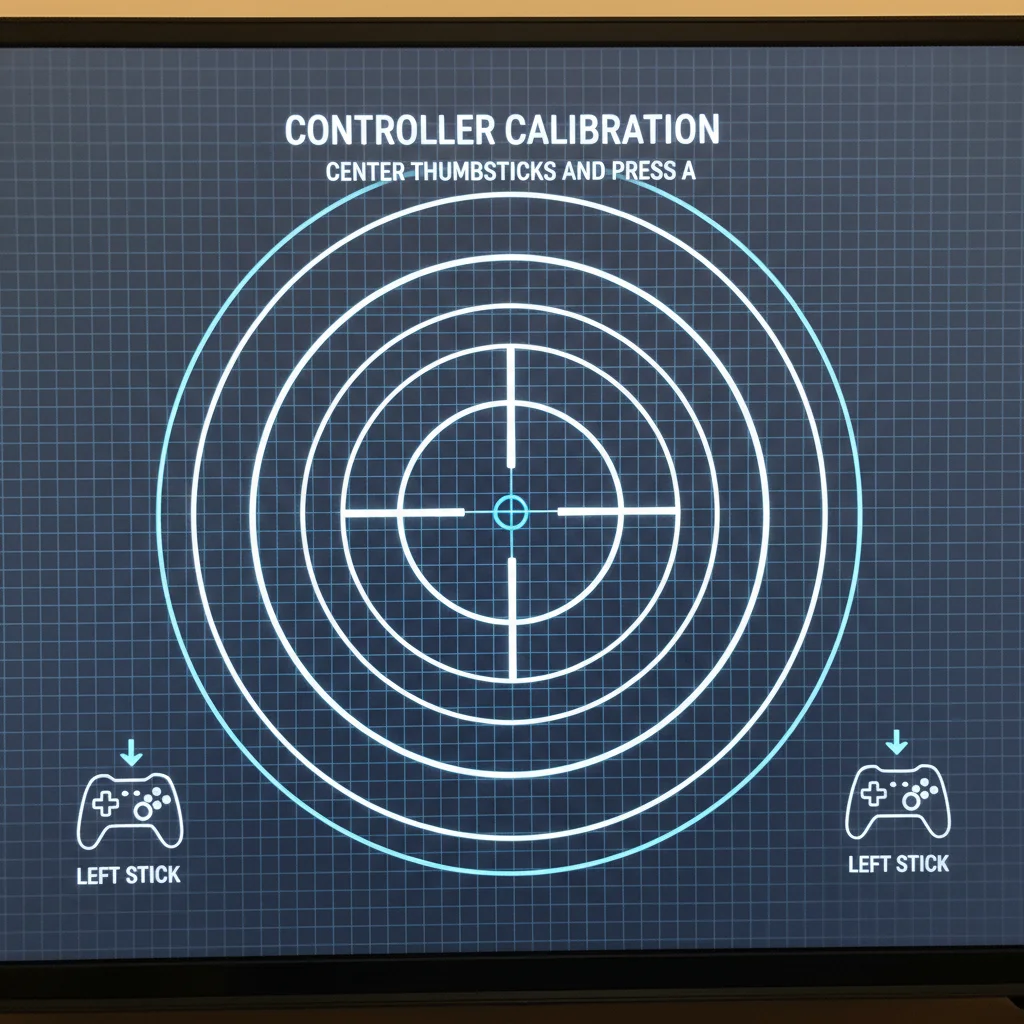
Calibrating Centering for Peak Precision
Post-mod, your thumbsticks might not perfectly return to center. This can lead to unwanted character movement or aim drift.
Accurate centering is vital for precision and control in any competitive game. It gives you a true competitive advantage.
Many modern consoles and PC operating systems offer built-in calibration tools. Utilize these immediately after your tension mod.
For PC users, check your controller’s manufacturer software or Windows Game Controllers settings.
Sometimes, physical adjustments are needed. Ensure tension rings or modules are seated correctly.
A slight misalignment can impact centering. Double-check all connections made during the mod process.
Controller Centering Checklist:
- Access your console’s or PC’s controller calibration settings.
- Follow the on-screen instructions to reset and recalibrate stick input.
- Confirm the stick returns to a perfect zero position in the calibration tool.
- If not, re-examine the physical installation of your tension mod.
Fixing Persistent Stick Drift Issues
Stick drift occurs when your controller registers input without your touch. This phantom movement is a competitive gamer’s nightmare.
It causes your character to walk off cliffs or your reticle to wander. You need to eliminate it for peak performance.
Traditional potentiometers are prone to this. Modding can sometimes exacerbate existing issues. Dust or debris introduced during the mod can interfere with sensors.
Worn-out components might also become more apparent with new tension.
A common software fix involves increasing your dead zones. This tells your game to ignore minor stick inputs near the center.
While this mitigates drift, it slightly reduces initial responsiveness. Consider this a temporary solution.
For a deeper dive into preventing drift, explore advanced joystick technologies. Hall Effect joysticks use magnets instead of physical contacts.
This drastically reduces wear and the likelihood of drift. This information is key for long-term controller health.
Verify Your Fixes with Joltfly Device Tests
After any fix, thorough testing is essential. You need to confirm your controller is performing flawlessly.
Don’t just jump into a ranked match without verification.
Utilize online tools to check your controller’s precision. Joltfly offers a suite of device tests to pinpoint any lingering issues.
Test your controller’s input accuracy and response. Ensure your mod delivers the edge you seek.
Here’s a look at how common stick drift issues are across different console types. This data highlights the importance of robust solutions.
A bar chart showing controller stick drift prevalence by console type: Nintendo Switch Joy-Con (65%), Xbox One (43%), and PlayStation 4 (28%). Source: Faulty Controllers via VentureBeat.
This data, reported by Faulty Controllers and cited by VentureBeat, shows how widespread drift can be.
Nintendo Switch Joy-Cons exhibit a significantly higher drift rate at 65%. Xbox One controllers follow at 43%, and PS4 controllers at 28%.
Don’t let stick drift or poor centering hold back your skills. Apply these troubleshooting steps. Get your controller calibrated and ready to dominate your gaming circle.
Then head over to Joltfly’s Device Tests to confirm your fixes.
In Short
- After modifying controller thumbstick tension, issues like improper centering and stick drift often arise, requiring troubleshooting.
- Centering problems can be fixed using console/PC calibration tools or physical adjustments, while stick drift can be managed with dead zones or prevented with Hall Effect joysticks.
- Always verify controller fixes using device tests like Joltfly to ensure optimal performance and input accuracy.